Some helpful tips on navigating the calendar effectively
The key to using the Calendar is to double-click on an available time slot to create an appointment, double-click on top of an appointment to edit that appointment, or right-click on top of an appointment to access the menu.
To enter the Calendar, hover over Schedule in the Tool Bar of Envision and select Appointments from the drop-down menu.
Schedule > Appointments
Appointment Dates (Top Left)
Use the calendar on the far left to select the date you wish to book appointments. The single arrows to the sides of the month's name will move you one month ahead or behind. The double arrows to the sides of the month name will move you three months ahead or behind. Just click any date to change the Appointment Calendar to that day.
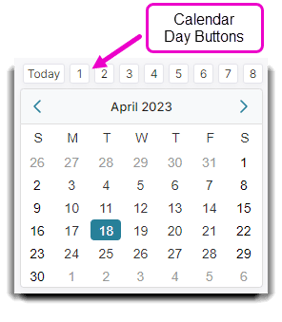
Calendar Day Buttons: The "Today" button at the top of the calendar can be used to move you back to today's date. This is very useful after you have set appointments for dates in the future and want to display today's schedule of appointments. The blue number buttons will move you to the corresponding number of weeks ahead in the calendar from today's date.
Filters (Bottom Left)

You may select a single employee or employee department from the drop-down selection boxes in this section to view a single employee or department. This is useful when there are a large number of employees on the calendar.
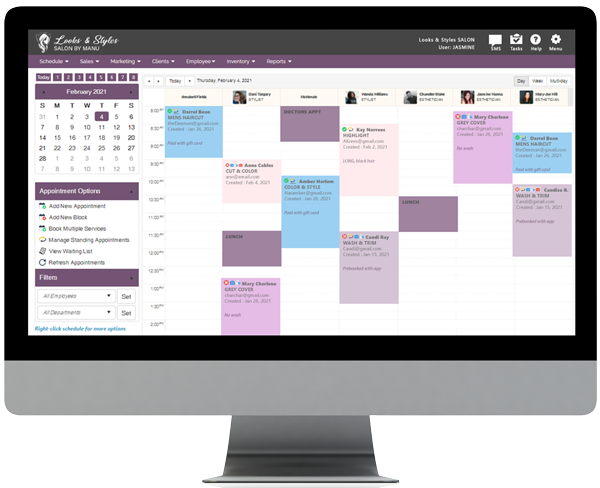
Appointment Calendar Time
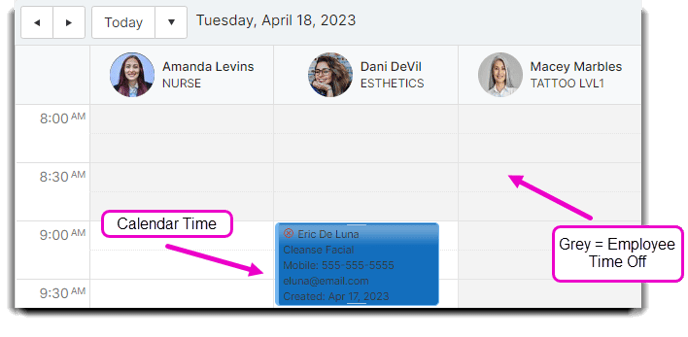
The time you have set for your store hours when you set up the program is the range of times shown on the column on the left. The white blocks indicate that the employee is available for those hours. By default, this will encompass the Store Hours you set.
You can change the hours available for an employee by going to the Employee Schedule and entering their work hours. If the employee is not scheduled to work, the area of their column that they are not scheduled will be grayed out.
For example, in the image above, Janet Yun is not scheduled to start work until 10:00 AM. Her hours from 9:00 to 10:00 are grayed out because she is not scheduled to work.
Scheduling an Appointment
Double-click on an empty time slot under an employee's column to schedule an appointment. A Schedule Appointment screen will open for you to book the appointment.
Employee Off Time Color
This color can be changed in the Company Settings.
Column Heading
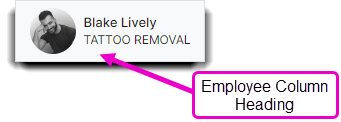
The top row of the Appointment Calendar displays the employees available for appointments. You can double-click on the employee's column heading to switch to a weekly view of the employee's appointments. When you double-click on an empty time slot in an employee's column, that employee will automatically be selected for the appointment.
Calendar Appointment Colors
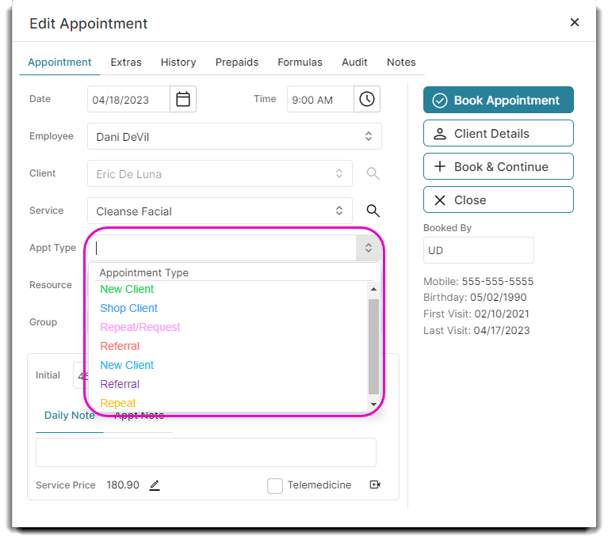
When you schedule an appointment with an appointment type, the outline of the appointment box will change colors according to the colors you assigned for each type.
For example: The yellow outline on Eric De Luna's appointment on the calendar notes his appointment type. This means this appointment is for a Repeat client.
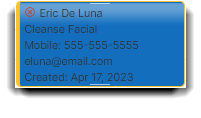
Calendar Note Tool Tips
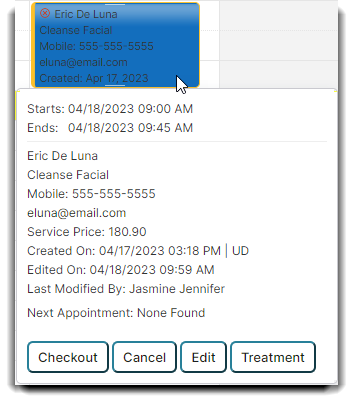
Hover your cursor over an appointment to see more information about the appointment that is booked.
This is useful if you are not able to see the entire name of the client that is coming in, or if you need to quickly view the client's:
- Membership Type
- Next Membership Billing
- Last 4 digits of the Credit Card stored on file
- Daily or Appointment Notes
- Appointment Time
- Service(s) they booked
- Estimated Service Price
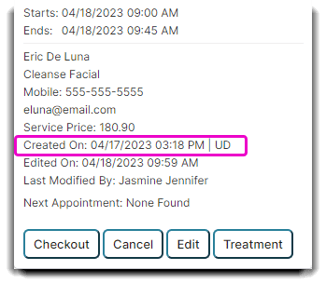
- Booking Source (API, Google, Online Booking, My Dash, Envision)
You can require employees to list a source when booking the appointment. In the example below, the "UD" is the required input.
There is a checkbox under Schedule Options in Company Settings.
☑️"Require initials to be entered when booking"
Company Settings > Schedule Options > General Schedule Options > Booking Options
Note: Appointments may show icons to give more information.
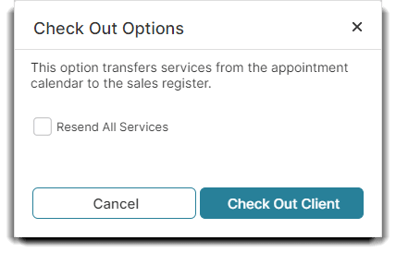
Checkout
When you click Checkout a window will pop up to take you to the sales register. The Resend All Services option ensures you don't lose any services or retail items from an appointment. This option is helpful if you checked out a client for a package earlier in the day before they received their services. Check the Resend All Services so the sales register isn't blank when you click Check Out Client.
Cancel
This will cancel any services.
Edit
This will take you to the book appointment screen and you can edit a client's appointment if necessary.
Treatment
This will take you to the client's treatment screen/plan.
Set Calendar View (Bottom)

Clicking this will toggle between displaying only business hours (set in the Company Settings) and a 24-hour view. This is useful when a booking is going to take place outside of normal business hours.
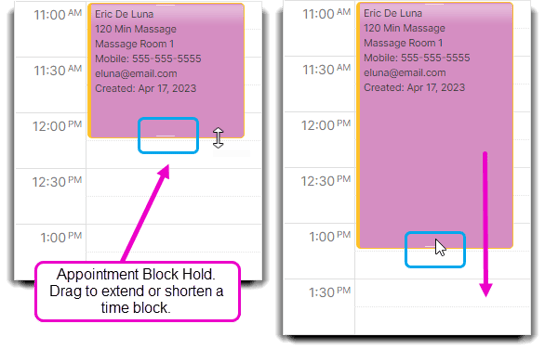
Drag Drop Extend
You can drag-n-drop appointments and block times from different time slots and employee columns on the calendar by clicking and dragging on top of appointment blocks.
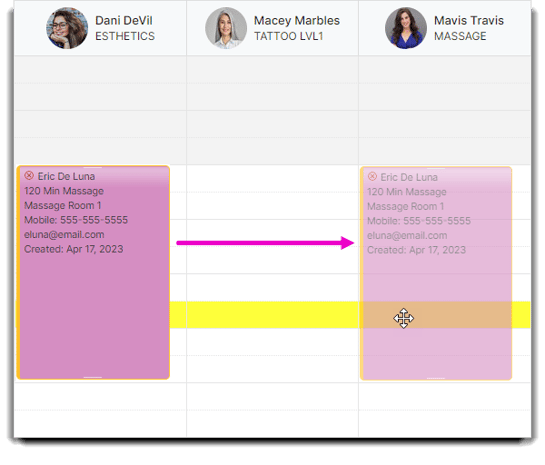
You can extend or shorten the time block of an appointment by dragging the top and bottom holds on an appointment block.
Service Appointment With Processing Time
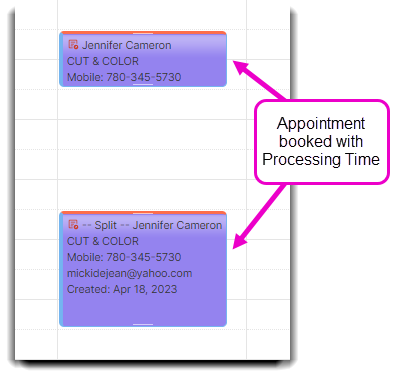
A service booked with a processing time is a service that requires a period of time to elapse between the first part of the service and the final part. For example, if you have a service for hair color, it takes an amount of time to apply the color, then it must process in the hair for a set period of time, and then a rinse, cut or styling must be completed.
This program allows this type of Inventory Service item so that the employee is available for other appointments during the processing time. If you move this appointment, both parts move since the program treats both parts as one appointment. Displayed above is a screenshot of a Service with processing time.
Appointments that have processing times will have an orange bar on the left side of their appointment box on the calendar as shown next to the arrows in the example above.
Calendar Time Bar
The current time slot row (based on the time as set on the computer) can be highlighted with yellow or any other color for easier navigation. Set the color in the Company Settings.
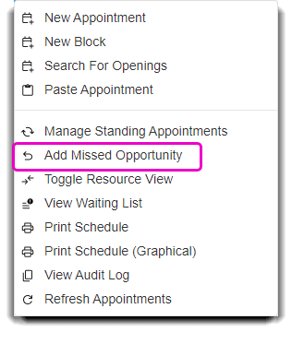
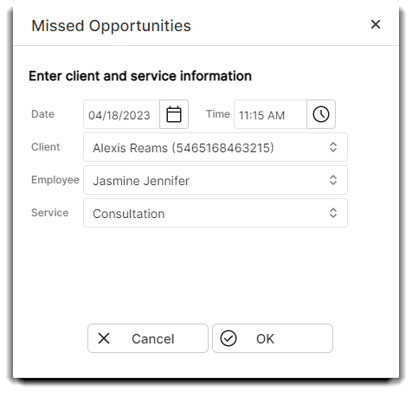
Add Missed Opportunity (Ultimate Only)
By right-clicking anywhere on the calendar, a dropdown appears which has the option to Add Missed Opportunity. A missed opportunity when a client is unable to schedule with your business due to scheduling or availability. You can now log these instances and track them in the Missed Opportunities Report.
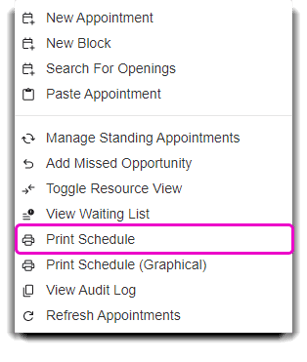
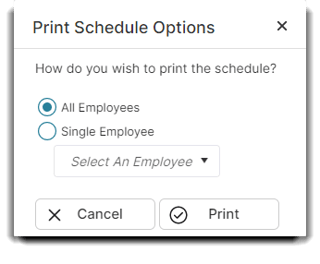
Printing the Appointment Calendar
By right-clicking on the calendar, a dropdown appears which has the option to select Print Schedule. You can choose between printing All Employees or Single Employee. A downloaded PDF of the schedule then is ready to print!