
A step-by-step guide to checking out groups
With Group checkouts, you can either Bill to Organizer (bill the entire group to one person, this is the checkbox you would've selected in the Group creation process), or bill each Group member separately.
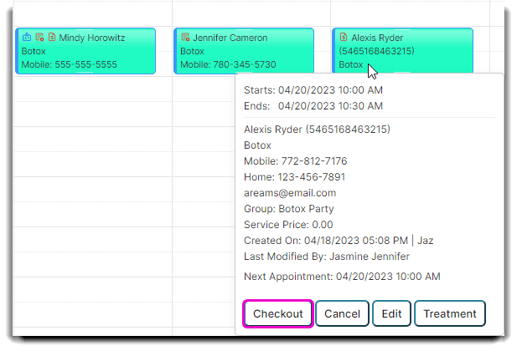
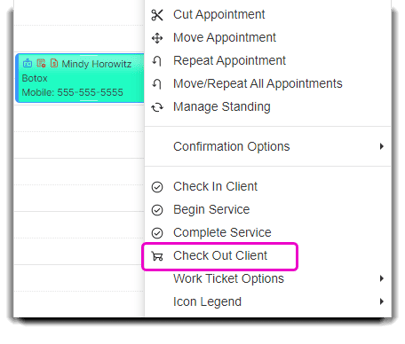
You can get to the checkout screen two ways:
Hover over an appointment and click the Checkout button within the Tool Tip:
Or right click on an appointment and select Check Out Client:
After you click on either of those options, this popup will appear on your screen:
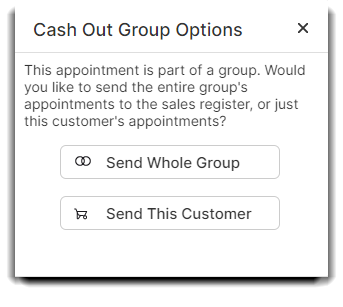
Select Send Whole Group if you want to bill the entire Group under one client.
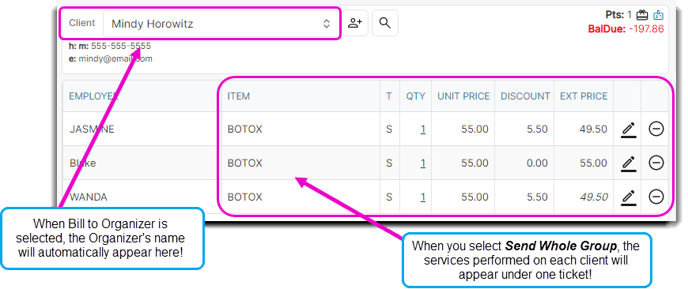
If you selected Bill to Organizer when you created the Group, you will be taken directly to the POS screen. The Organizer's name will appear automatically in the Client dropdown menu at the top.
Choose Send This Customer Only if you wish to bill the selected client separately.
If you bill one client separately, you can still bill the remainder of the Group under one person. Simply right click and select Check Out Client on a different appointment from a member of the same Group. When this popup appears, select Send Whole Group and the Clients from the Group that have not been checked out yet will appear in the POS.
Once you've selected the correct option, process your payment transactions through the POS as normal.

If the Organizer no longer wants to pay for the full bill, you can always edit the Group's preferences to deselect the option.
If another Group member wants to pay the full bill but you checked the Bill to Organizer option, you can still change the Client name on the top of the POS window. Just select the dropdown and replace the Organizer's name with the name of the Client who wishes to pay the full bill.