Add, edit, schedule, checkout, and manage Groups/Parties Booking
👥 Create Groups/Parties
Before you can schedule your Group, you must create a new Group. You can do this by going to your appointment calendar.
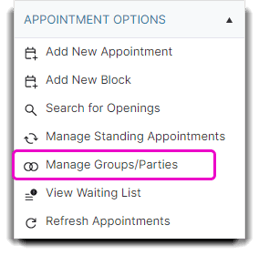
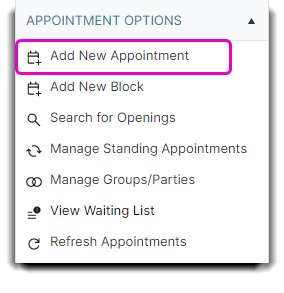
1. Click on Manage Groups/Parties in the menu on the left of the calendar.
Schedule > Appointments > Appointment Options > Manage Groups/Parties
2. When the Appointment Groups window pops open, you will see two sections of the screen: Arriving Today and Group Details (shown below).
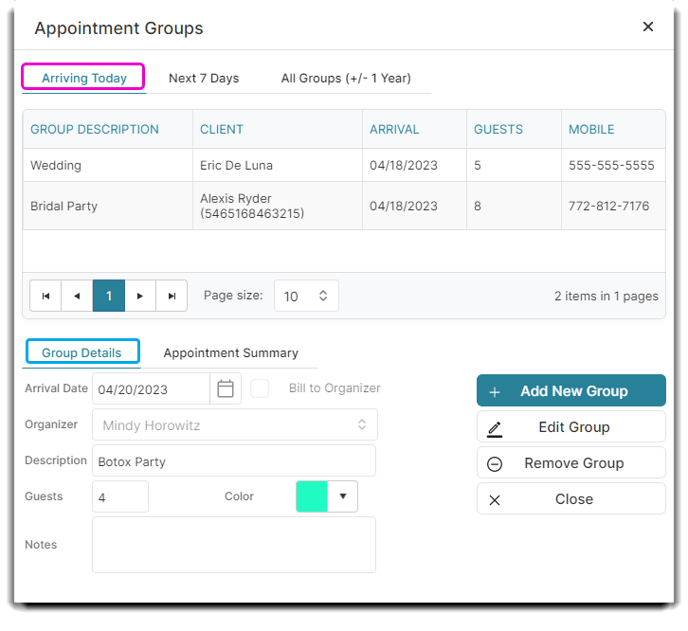
To create a new Group, focus on the Group Details section represented by the blue box in the image above.
3. Select the Add New Group button.
4. In the Group Information pop up window, fill out the Group's Arrival Date. 
5. Select the Group Organizer. If you check the Bill to Organizer checkbox next to Arrival Date, the entire group will be billed under this Organizer making for a speedy check-out process.
6. Next, fill out the Group's Description.
The Description is what the group will be named in the system, so you want to be as specific as possible. For example, if you're booking multiple wedding groups, make sure you give them each a unique name to avoid any mix-ups.
7. Fill out the number of Guests in the group. This is to notify the business of how many people they should expect.
8. Assign a Calendar Color to your group. Use color coding to help organize your groups or easily distinguish a group from a regular client on the Schedule.
9. Type any group notes you have in the Notes box.
10. When you are finished editing the group, click Save.

🗓️Schedule Groups/Parties
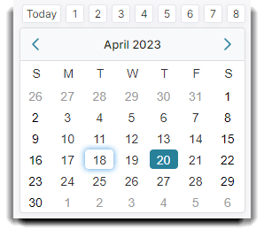
1. Use the Calendar on the left of your Appointment Screen to select the date of your booking.
2. Double click a time slot under an Employee to schedule the Group Organizer's appointment. You can also do this by clicking Add New Appointment on the left.
3. Select your Client. In this example, we chose Alexis Ryder.
4. Proceed to enter the service you want to book.
5. Fill out the Appointment Type to select whether the Client is a New Guest, Shop Client, Repeat/Request or Referral appointment.
6. Once you've input all of the above, select the Group dropdown and click on the Group you created in the Manage Group/Parties screen.
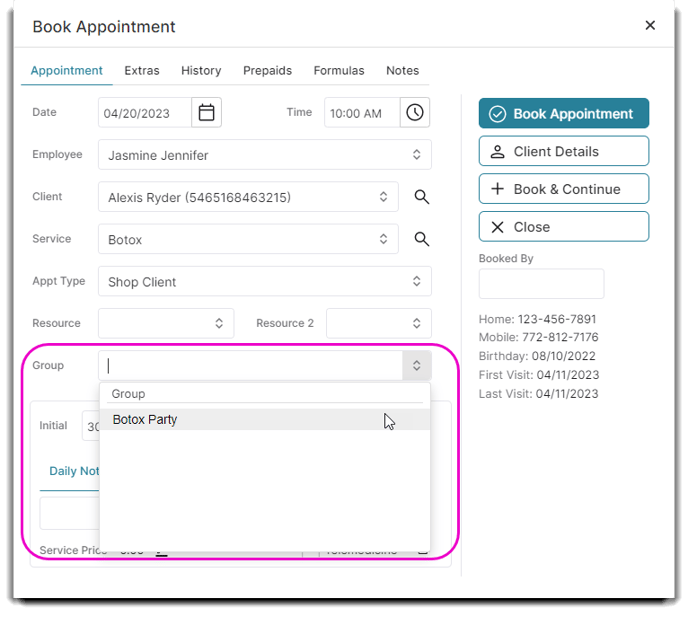
7. Click Save when you are done!
When you finish adding the Group Organizer, repeat the same steps until all Group Members are individually booked. Make sure you select the right group for each Group Member's appointment.
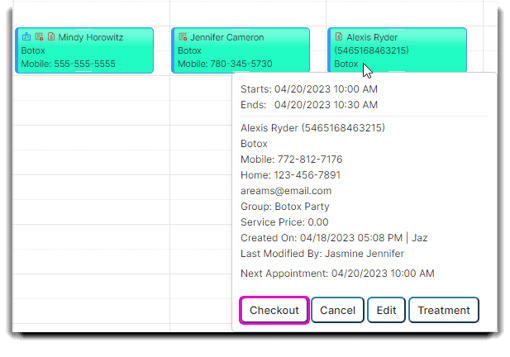
If done correctly, each Group Member's appointment will be assigned the same color as the one you selected when you created the Group:

💰Check Out Groups/Parties
With Group checkouts, you can either Bill to Organizer (bill the entire group to one person, this is the checkbox you would've selected in the Group creation process), or bill each Group member separately.
You can get to the checkout screen two ways:
Hover over an appointment and click the Checkout button within the Tool Tip:
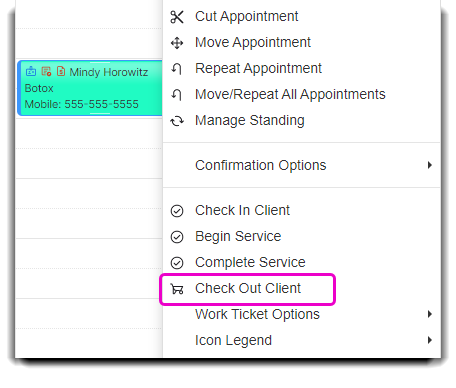
Or right click on an appointment and select Check Out Client:
After you click on either of those options, this popup will appear on your screen:
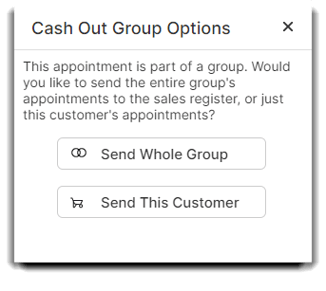
Choose Send This Customer Only if you wish to bill the selected client separately.
Select Send Whole Group if you want to bill the entire Group under one client.
If you selected Bill to Organizer when you created the Group, you will be taken directly to the POS screen. The Organizer's name will appear automatically in the Client dropdown menu at the top.
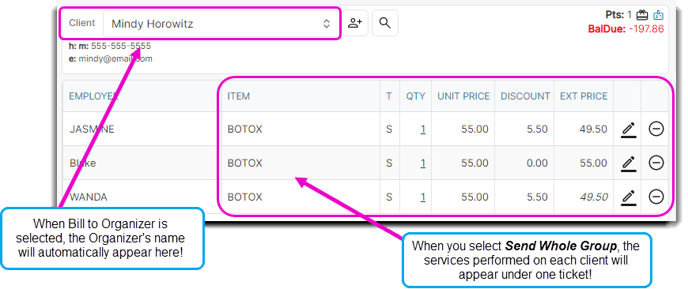
If you bill one client separately, you can still bill the remainder of the Group under one person. Simply right click and select Check Out Client on a different appointment from a member of the same Group. When this popup appears, select Send Whole Group and the Clients from the Group that have not been checked out yet will appear in the POS.
Once you've selected the correct option, process your payment transactions through the POS as normal.

If the Organizer no longer wants to pay for the full bill, you can always edit the Group's preferences to deselect the option.
If another Group member wants to pay the full bill but you checked the Bill to Organizer option, you can still change the Client name on the top of the POS window. Just select the dropdown and replace the Organizer's name with the name of the Client who wishes to pay the full bill.
👨💻Manage Groups/Parties
If you need to add, edit, or remove a group, select the Manage Groups/Parties button from the Appointment Schedule. You can also see the upcoming groups within 7 days.
The Appointment Groups screen will popup:
The top half (shown in the yellow box), includes tabs to view and manage your groups.
The Arriving Today tab shows you all groups that are scheduled for the current day.
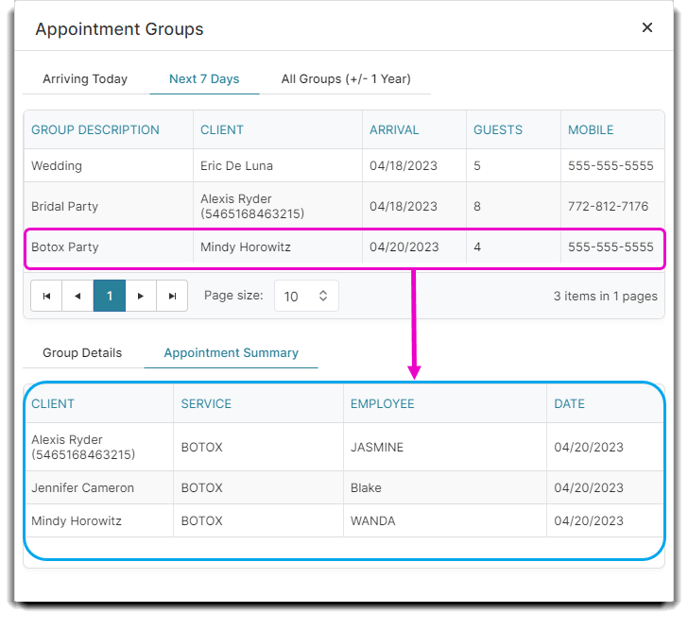
The Next 7 Days tab shows you all scheduled groups within the next 7 days.
The All Groups (+/- 1 Year) displays all the Groups planned within the next year.
Selecting a group from any of these three tabs will show you all Group information and allow you to edit or remove the group through the Group Details tab (shown in the red box):
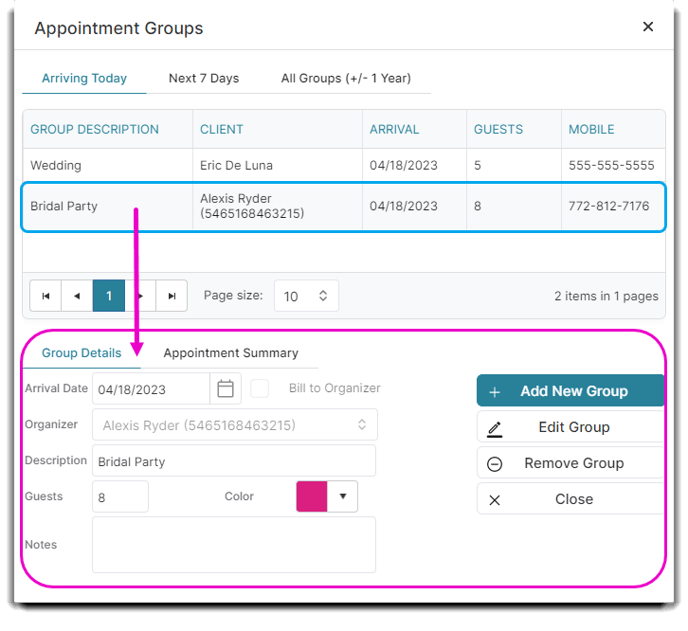
Click on the Appointment Summary Tab at the bottom next to the Group Details tab to view all Clients and scheduled services affiliated with the selected Group.