
Learn how to add, edit, merge, schedule and sell packages
Packages will allow you to combine items (services and/or retail) so that you may sell these items together at a discounted price. There are two types of packages you can create; series and single day.
A series package is a prepaid package of the same service in multiple quantities. Selling a prepaid series package also guarantees your business revenue as clients return for services, allowing you the opportunity to up-sell and increase your business' retention.
A single day package includes a variety of services or retail items for that same day. For example, a common single day package would include manicure, pedicure and one massage. This is often offered at many day spas.
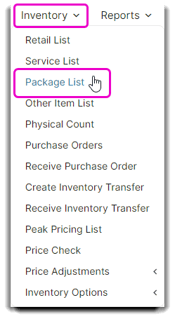
To start creating, editing, scheduling and selling your packages hover over Inventory in the tool bar of Envision and select Package List from the drop-down then select 'Add a New Package'.
Below is an overview of the 'Add a New Package' options:
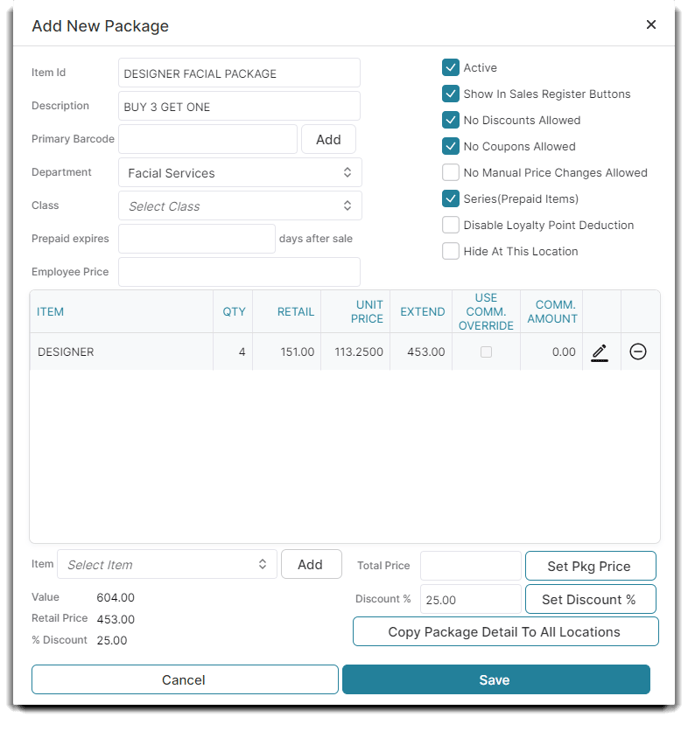
Item Id
The Item Id is how you will most often refer to a service within the software. Typically it is the name of the service or an abbreviation of that name. You will want the ID to be unique and meaningful to help avoid any confusion.
Package Id Tip: You may abbreviate the name of the product in this field. If you choose to abbreviate the name or enter an acronym, make sure that it is a name or acronym that everyone who will be using the Appointment Calendar and Point of Sale screen will be able to remember when searching for the item.
Active
You will always want your packages to be active until you stop offering them. Once they are inactive they will no longer show up on the appointment calendar or the point of sale but they will show in reports. You can reactivate a package at any time.
Description
The Description is a plain language name of the item that would be used outside of your business. This is what will appear on your receipts and online booking page.
Barcode
If you use codes for packages, you may enter a barcode associated with this specific package. This will allow you to look up items in the point of sale by their barcode numbers.
Department
The Department field is available to organize your packages into groups or categories. Inventory Departments are shared for retail, service, and package items.
Class
Class is an additional way to organize your packages. In many cases it can be used as a sub-category for the department. Classes are shared for retail, service, and package items.
Prepaid expires ____ days after sale
This field allows you to set how long a prepaid lasts before expiring.
Show In Sales Register Product Buttons
Deselecting this option will not allow this item to show as a button in the sales register. By default, this is checked so the item will show.
No Discount Allowed
Select the checkbox to not allow discounts to be applied to this item in the Sales Register.
No Coupon Allowed
Select the checkbox to not allow coupons to be applied to this item in the Sales Register.
No Manual Price Changes
Selecting this box will not allow the item price to be changed by typing in a new price for it in the sales register.
Series (Prepaid Items)
For having a short name and only one check box, this is one of the most powerful features of the program.
By checking this box, you are telling the program this package will be used up when the client checks out at the Sales Register, the number of times equal to the "Qty" you set on the "Item Details" section of the screen. This also allows you to track the usage of the items the client has prepaid for.
For example, you wish to create a prepaid package of 10 Swedish Massages. You would check this box and on the "Package Details" screen select the inventory item Swedish Massage. Then enter a quantity ("Qty") of 10. When a client gets a Swedish Massage and checks out at the Sales Register, you would offer to sell them the package of 10, explaining that this is a savings over the individual purchases. If the client decides to purchase the package, you select the package from inventory, select the client from your client listing (add them "On the Fly" if they're not already entered), and complete the sale. The package count of 10 is assigned to this customer and they are charged for the total package (prepaid).
You will then need to create a separate sales transaction for the Swedish Massage they used that day. When their Client Id is selected along with the Swedish Massage, the Extended Price of the service will be "$0.00" because they paid for the service when they purchased the package in the first sales transaction. The count on their prepaid Swedish Massages will be reduced to 9. The next time they come in for this service, and they are checked out in the Sales Register, they will not be charged but their count will be reduced to 8. Envision will not charge the client at the Sales Register for this item until all the items in their package have been used.
Hide At This Location
Check this option to hide the package from this location.
Package Item Listing
A list of all items added as part of this package will show here.
Select the pencil to edit an item that has been added to the list. From here, you will be able to edit the quantity, unit price, choose if you wish to use an override of commission, and set the dollar amount of the commission override.
Select the red button in the package item list to remove an item from the package.
Item Selection Box
Choose the item you wish to add to the package using this drop-down selection box. Once chosen here, click the "Add" button just to the right.
Add Item Button
After choosing the item you wish to add to the package in the drop-down selection box, click this button to add the item to the listing area above.
Value
The value section shows the total, non-discounted value of the items within the package.
Retail Price
Retail Price shows the total discounted price of the package.
% Discount
The percentage discount section displays the discount percentage, whether it was entered on the right, or the package price was entered.
Total Price
If you know the dollar amount you wish to set as the package price, enter it here. Once entered, you will need to click the Set Pkg Price button to apply the price.
Discount %
If you know the percentage you wish to discount the package price, enter it here. Once entered, you will need to click the Set Discount % button to apply the discount percentage.
Copy Package Detail To All Locations
Selecting this button will copy the pricing to all other locations. This will overwrite any price that was entered at the other locations.
🛠️ Create Single Day Package
To create a new package hover over Inventory in the tool bar of Envision and select Package List from the drop-down then select 'Add a New Package' from the left menu. From there, you must fill in the two required fields (Item ID and Description). Now add your variety of items, choose your fixed or discounted price and check on or off the package options that are explained above.
🛠️ Create Series Prepaid Package
To create a new package hover over Inventory in the tool bar of Envision and select Package List from the drop-down then select 'Add a New Package' from the left menu. From there, you must fill in the two required fields (Item ID and Description). Now add your item. Once you've added the item, click the yellow pencil to add quantity. Once you've changed the quantity of the item you can choose your fixed or discounted price and check on or off the package options that are explained above.
✏️ Edit Package
To edit a package, simply go to the package list and either double click one the package you need to edit or click once on the package then click 'Edit Selected Package' in the left menu. You are able to edit all fields at any time.
💡 Merge Packages
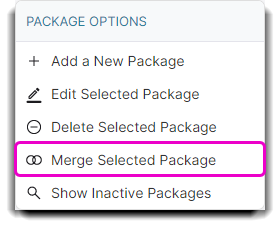
Merging packages will erase the existing package's record from the system, sales history, reports, appointments, etc. This feature can be used to cut down on duplicate packages or bring similar packages into one. A merge CAN NOT be undone. Learn More Here.
📆 Schedule Package
Once you have created your series and/or single day packages you can now sell them. To schedule a package you must go to the 'Schedule' calendar and click 'Search for Openings' on the left menu under 'Appointment Options'. You can also right click anywhere on the calendar and 'Search for Openings' will be listed at the top.
You then enter the date the client would like the services done, and the client who wants the package. Then select the package from the dropdown and click 'Add To List'.
You will see all the items added. Now you may chose the employee for each service and reorder the services if necessary.
❗ If 'First Available' is left for all services, Envision will book with the same employee if they available for all services. It is preferred to chose the employee corresponding to each service in the package.
Once you are done you may then click 'Show Availability'.
Now you can select the time/day to schedule the package and click 'Book Scheduled'. *Click the small arrows on the left to show all services in the packages.
You must sell a Series Prepaid Package before you check them out from the calendar so that they have prepaid items in their account during the checkout process.
💲 Sell Single Day Package
Once you've scheduled your package and are ready to check out your client, right click on any of the appointments for that package on the calendar and click 'Check Out Client'. It will add all services in that package to you register with the corresponding employees if chosen. This will also allow you to allocate tips between employees with our split tips calculator. Continue to check out client as usual.
💲 Sell Series Prepaid Package
To sell a prepaid package go to the register and select the client who wants to buy the package. Then select the Series Package in the item dropdown and check out as usual. Now you can schedule and checkout a client that had a prepaid service done from a series package.
Note: You can check the amount of prepaids a client has by navigating to their client profile and clicking on the prepaids tab.