
How to create a vendor
The Vendor List is available for you to enter all the vendors that you purchase products from. Creating this list will allow you to specify the vendor that you purchase a certain product from and will also allow you to create a purchase order for the products that need to be purchased from that vendor.
Inventory > Inventory Options > Vendors
To enter the Vendor List,
- Hover over Inventory in the Tool Bar of Envision,
- Hover over Inventory Options, and
- Select Vendors from the drop down menu.
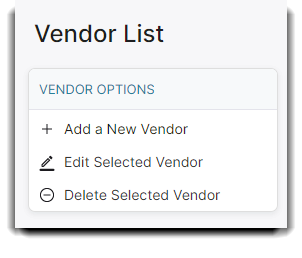
- Select to Add a New Vendor.
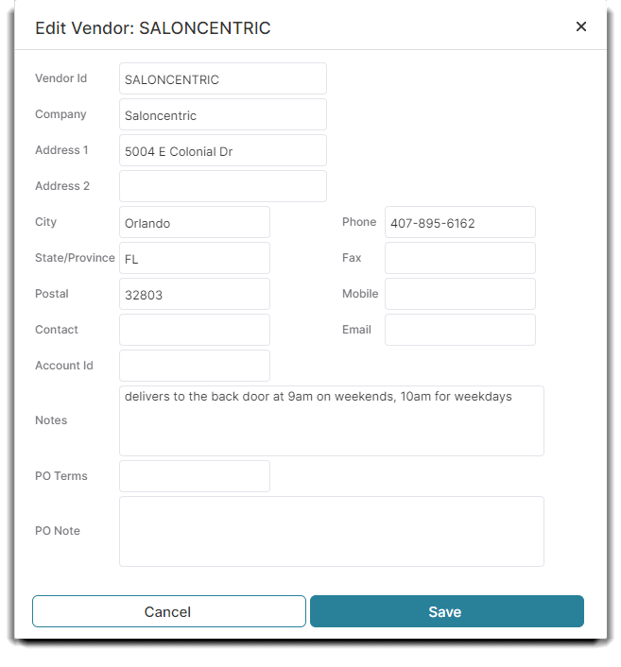
- Enter a Vendor Id. The Vendor Id is how you will most often refer to a vendor inside of the software. Most often you can just use the vendor's company name or an abbreviated version of the name.
- Enter the full name of the vendor in the company field. This is the name that will display on purchase orders.
- The address and phone fields are standard fields. This information will be printed out on purchase orders.
- Enter the name of the person you most often speak to or correspond with at the vendor company.
- (Optional) The Account Id field is used for your own reference if your vendor assigns you an account number. This prints on purchase orders
- (Optional) Enter notes about the vendor.
- (Optional) Enter any Default PO Terms for this vendor here. This information will populate onto purchase orders created for this vendor.
- (Optional) Enter a Default PO Note to show on all purchase orders for this vendor.