
How to create, copy, print or email employee work schedules
The Employee Work Schedule is where you will set the hours that each employee is available for booking in the Appointment Calendar.
To enter the Employee Work Schedule screen, click on Employee on the Tool Bar, and select Work Schedule from the drop-down.
Employee > Work Schedule
Copy Schedules
This screen allows you to copy a schedule you have created for one week to as many weeks as you wish (up to a year out).
Copy Schedule Options
Select either All Employees or Single Employee. If you select Single Employee, you must select the employee from the drop-down list.
Copy Weeks
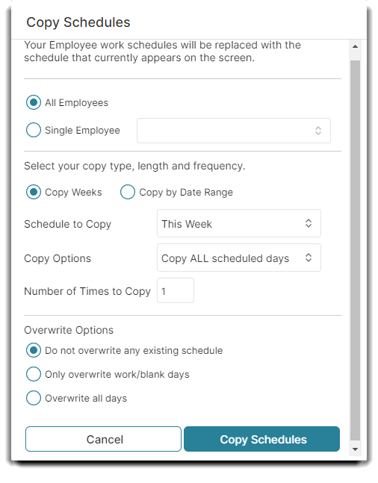
Schedule to Copy
Select the weeks you wish to copy forward. For example, if you choose to copy the Next 2 Weeks, this will copy this week's schedule and next week's schedule forward.
Copy Options
Choose whether to Copy ALL scheduled days which would include shifts of varying work types like vacation or education or Only copy work days which would only copy shifts with the work type "work" selected.
Number of Times to Copy Schedule
Enter the number of times you wish to copy forward the schedule.
Important Note: You may copy a schedule forward a maximum of 52 weeks. If you wish to copy an employee's schedule further than that, first copy the schedule forward 12 months. Then, use the small calendar in the upper left to move to the last week that copied. You may then copy the schedule forward another 12 months or 52 weeks from that date.
Copy By Date Range
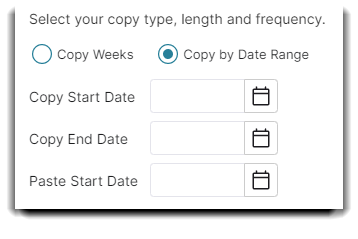
Copy Start Date
Select the beginning date of the date range that you wish to copy. This defines the date range that you want copied.
Copy End Date
Select the last date of the date range that you wish to copy. This defines the date range that you want copied.
Paste Start Date
Choose the day that you wish the copying to begin on. This designates which date to begin duplicating the date range entered above.
Important Note: It is recommended to select the same day of the week in the first and third boxes so that the schedule copies forward smoothly.
Do not overwrite any existing schedules
This option will not allow changing schedules that have already been input and is recommended to stay selected if you are simply carrying a schedule further in advance or adding an additional workday to the week.
Only overwrite Work/Blank days
This option will only allow shifts with the work type "Work" selected and days with no work schedule information put in to be overwritten! This means days with the work type set to other options like "Vacation" or "Sick" will not be affected by the copied schedule.
Overwrite all days
By selecting this option, when a schedule is copied, it overwrites all future schedule information no matter the work type.
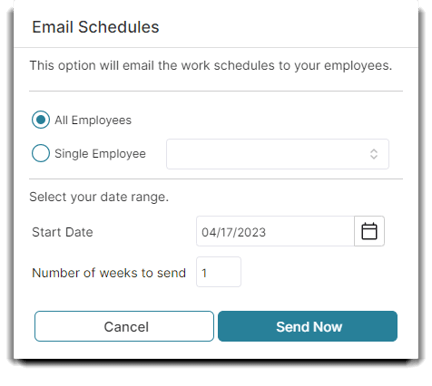
Email Schedules
Click this button to open a screen that will allow you to send all or a single employee their work schedule for the number of weeks that you choose.
Department
Select a single employee department in this drop-down selection box to view only staff assigned to that department.
Sort By
Select how you would like to sort the list of employees on this screen.
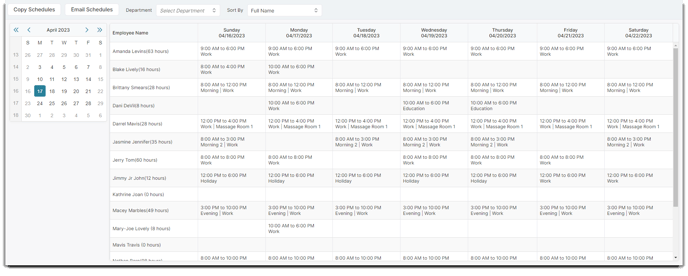
Employee Column
The employee column will show the employee name and the number of scheduled hours. Clicking in the employee column will open a quick-entry screen, allowing you to input hours or a shift for multiple days at once.
Quick Entry Screen
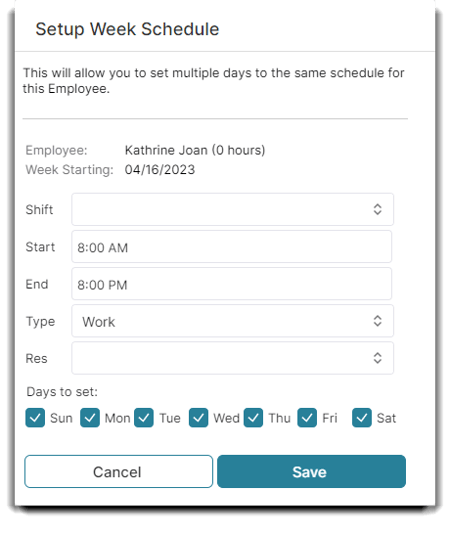
Shift
Choose the shift that you wish to assign to this employee. Selecting a shift here will automatically enter the times for that shift.
🕑 Entering Schedule Hours
1. Click on cell (day) to the right of the employee's name you are entering hours for.
2. Enter either the shift or Start Time and End Time in the section below the name of the employee and the date.
3. Enter the Type of work.
4. Click the Save button when you have finished entering this information.
Employee Schedule Calendar
Use the Calendar in the upper left-hand corner to select the week that you would like to enter an employee schedule for.
Type
Select the type of schedule that you are entering. For example, you would select "Work" if they are working, or "Off" if they are not scheduled to work.
🖨️ Print Work Schedule on Calendar Screen
You can print the work schedule from the Schedule tab. Right-click over an available appointment time-slot:
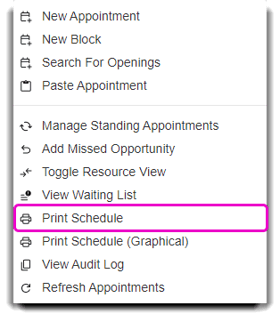
There are two different print schedule options: Print Schedule--which is a standard list of times and clients--or the Graphical version--a printout of your appointment calendar as it appears on Envision.
The following popup window will appear on your screen when you select the Print Schedule option:
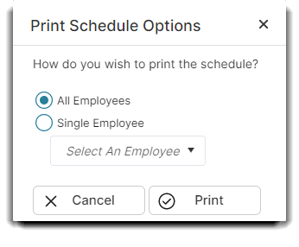
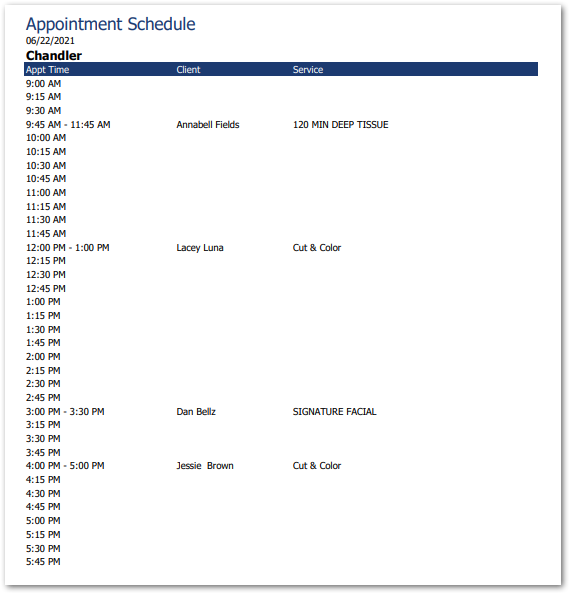
You can select whether you want to print only one employee's schedule, or all of your employees' schedules. The printed schedule will look something like this:
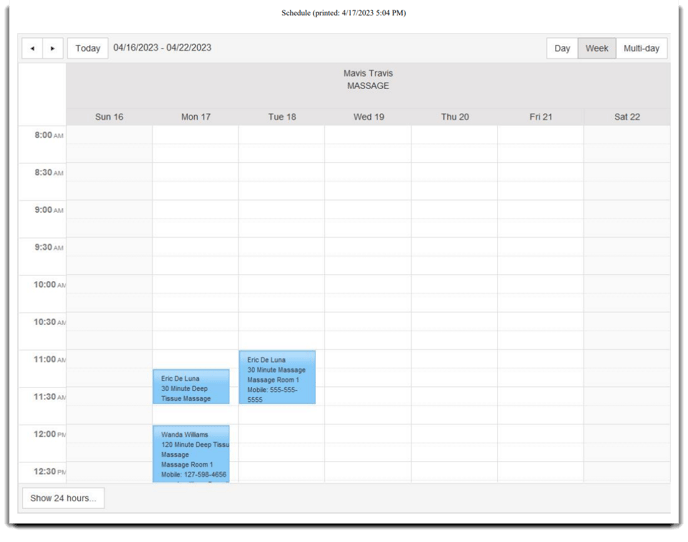
When you select Print Schedule (Graphical), the popup window will not appear, but you will be able to print a visual schedule that looks like the appointment calendar. You can do this for a single employee, or print all employee schedules on one calendar.
Single Employee:
All Employees:
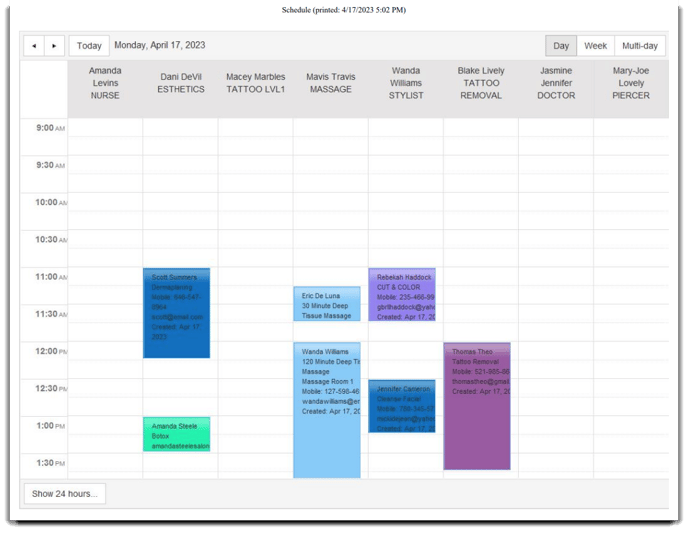
Helpful Tip: The Graphical printout acts much like a screenshot. If your appointment calendar is set to view only one person when you print, only that Employee's schedule will appear. If you want to print a Graphical printout including all of your Employees, make sure you can view all Employees in your appointment calendar before you print.