
EnvisionNow integrates with your WooCommerce store!
![]()
What this integrations does:
- Any time the product name/price/quantity/details are updated in EnvisionNow, changes will be pushed to your Woo store.
- Automatically send product updates from sales register, physical count, receiving POs, manual qty changes in retail lists to EnvisionNow.
- Orders created in your online store will also save into EnvisionNow and decrement product quantity. *Any manual qty or price changes IN WOO DIRECTLY will not update the stock levels in EnvisionNow. EnvisionNow is assumed/expected to be THE primary stock/price level system.
Note: If you have existing products / customers in your Woo store already, EnvisionNow does not pull those down. If you make an online order, and EnvisionNow does not have that product/customer in EnvisionNow already, we will create it at that point.
Before integrating with EnvisionNow you must sign up with WooCommerce
WooCommerce integration is for RETAIL ONLY.
Once you have signed up follow these steps to integrate your Woo store with EnvisionNow:
Step 1: Add Woo Commerce Add-On Service
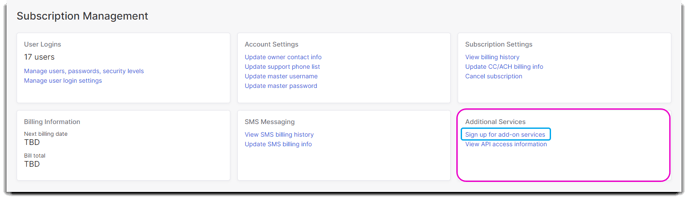
Navigate to Manage Account then click on Signup for add on services:

Click the Add to Subscription button:

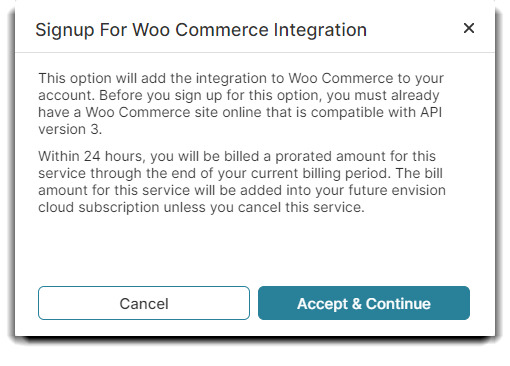
Be sure to read and understand the terms:
This option will add the integration to Woo Commerce to your account. Before you sign up for this option, you must already have a Woo Commerce site online that is compatible with API version 3.
Within 24 hours, you will be billed a prorated amount for this service through the end of your current billing period. The bill amount for this service will be added into your future subscription unless you cancel this service.
Click Accept Terms and Continue once you have read and understood the Terms.
Step 2: Configure Woo Store for EnvisionNow
1. Log into your Woo account at: https://yoursite.com/wp-json/wc/v3 ("yoursite.com" is your Woo site URL)
2. Navigate to the WooCommerce tab on the left: .png?width=165&name=mceclip8%20(3).png)
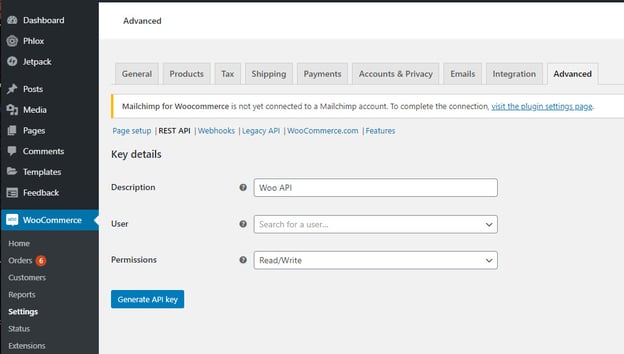
3. Type in your description and user name then set the permissions to Read/Write:
4. Click on Generate API Key button: .png?width=111&name=mceclip9%20(1).png)
You should come to a screen that looks like this:
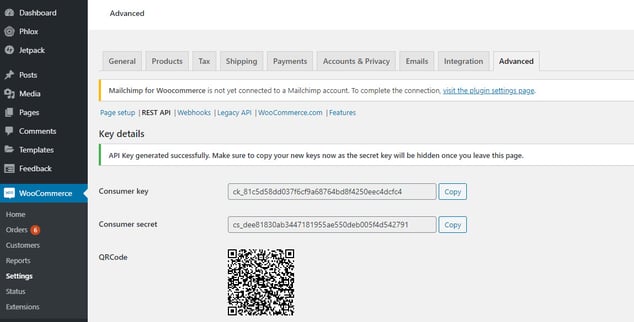
You will need this info in the next step.
Step 3: Setup Woo Commerce Options
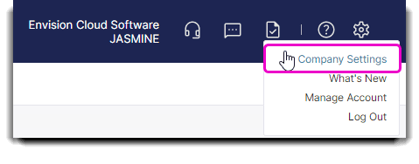
1. Navigate to Company Settings then click on the Integrations tab on the left:
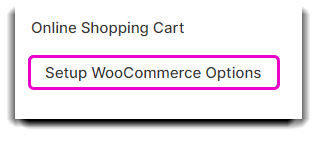
2. Click on the Setup WooCommerce Options button
3. A popup will appear and you will be required to enter your WooCommerce info:
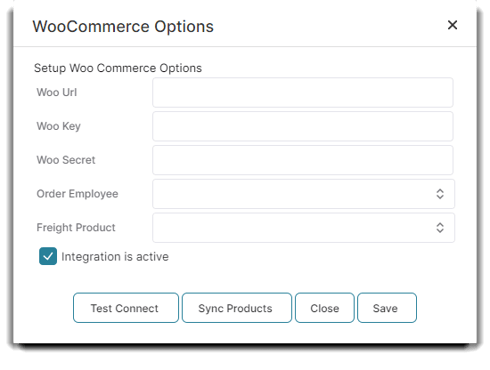
Note: This is the info you generated on your WooCommerce site in step 2:
.png?width=682&name=mceclip10%20(2).png)
4. Click on Sync Products.
Step 4: Start selling your products online
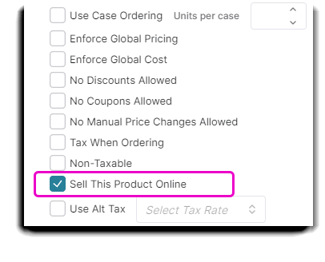
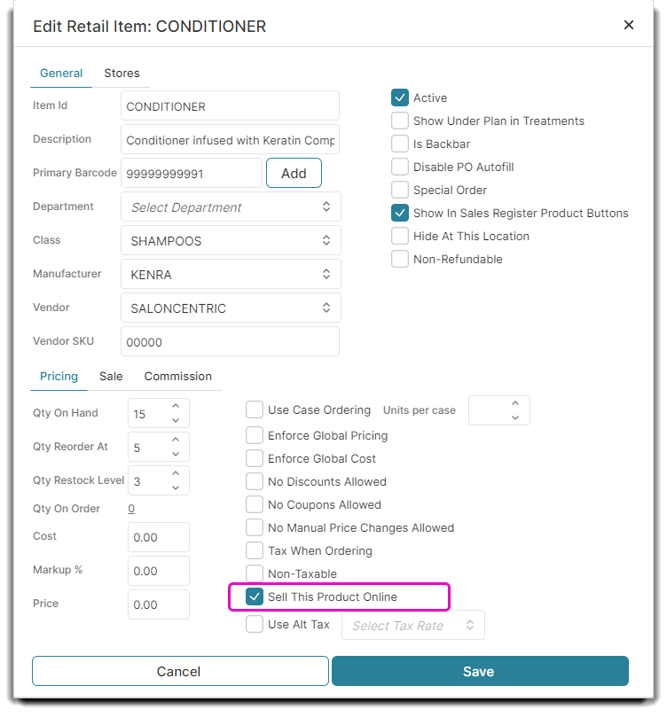
Now that you have set up the integration, you can now add products to your online Woo store!
Make sure to click the new Sell This Product Online checkbox in the retail item:
Congrats! You have setup your WooCommerce store to integrate with your EnvisionNow!