How to create and manage Security Profiles
This powerful but easy-to-use feature allows you to create security profiles that have limited access. Security Profiles are then assigned to employees either on the Account Subscription page or in the Employee Profile. Each Security Profile contains detailed information about what program features are accessible.
You can create a Profile that allows unlimited access to all program features or one that restricts the user to very few features. You might want to consider using descriptive names for these profiles, such as "Manager" for nearly unlimited access, "Owner" for totally unlimited access, and "Front Desk" or "Employees" for limited access.
How to access Security Profiles, Employee > Employee Options > Security Profiles.
Selected Security Profile options also restrict access to your Employees on Envision's Mobile App.
Click the links to skip to a section:
💇 Clients Tab 💊 Medical Tab 👥 Employees Tab 🛍️ Inventory Tab
📅 Schedule Tab 🏧 Sales Register Tab 📊 Reports Tab 📁 Other Tab
Additional Links:
🛡️ Remote Security Profiles 🔐 Limit Access to Client Info
👨⚕️ Treatment Screen Access (Medspa) 📜 External Tickets
♿ Accessibility Schedule 💡 Security Profile Tips
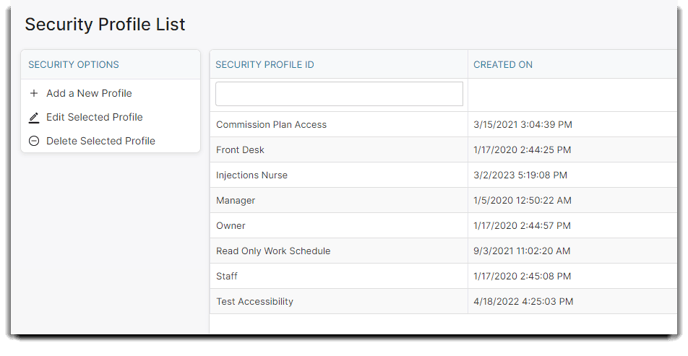
Create and Edit Security Profiles
Click on Employee on the Tool Bar, hover over Employee Options, and select Security Profiles from the drop-down.
Employee > Employee Options > Security Profiles
Security profiles set levels of access for the Envision program. Choosing what is or is not allowed to be accessed by employees assigned to the levels you create is highly customizable. At least one profile must have access to the security profile window or the system will default to allow this access.
Profile Name
Enter a name in the field at the top of this screen that best describes the type of employee that will be assigned this profile.
Feature Tabs
Each tab has a list of functions and menus relating to the category of the tab.
Check or Uncheck Menu Access
The list of options allows you to give access to individual menu selections in the program or grant functionality privileges.
Place a checkmark next to every item you wish members of this group to have access to. Remove the checkmark next to any item you wish to remove access to or disable functionality for.
Check All / Uncheck All
Choosing these options will check or uncheck all options on this page.
Clients Tab
This section allows you to control staff access to client information or the ability to affect clients. You can limit access to client information or the ability to delete or edit data in the platform. Some functions listed under the Clients tab include marketing, loyalty programs, membership programs, image access, document access, and more.
To limit employee access to client information, click here to learn more about those steps.
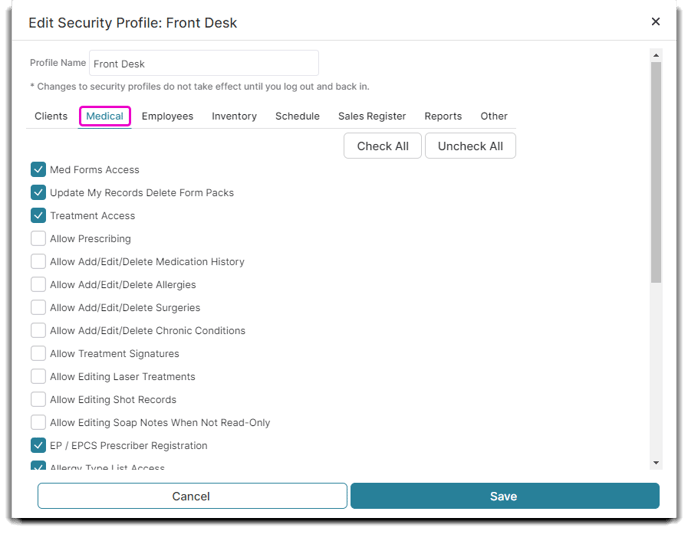
Medical Tab (PatientNow Essentials Only)
This section allows you to control access to patient medical information and the ability to edit or delete information from the platform. Some functions listed under the Medical tab include treatment screen access, ability to prescribe, access to specific sections of patient medical information (such as surgeries, allergies, injections, etc), and more.
To limit access for employees specifically related to the Treatment screen, click here to learn more.
Employees Tab
This section allows you to control access to the employee related functions on the platform. Some functions listed under the Employees tab includes performance metrics, ability to alter and change the employee list, ability to edit tasks or commission plans, and more.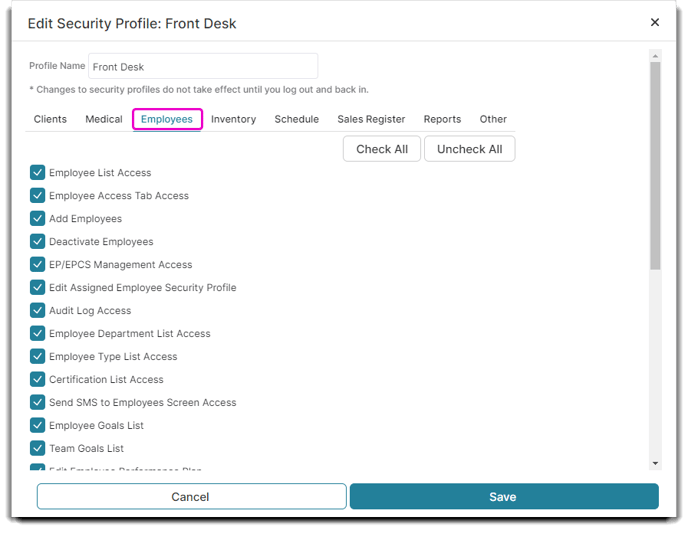
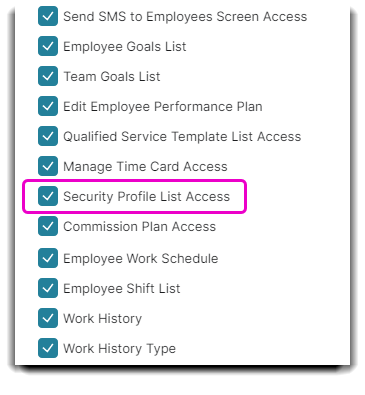
This tab also lists a Security Profile List Access option which will allow an employee to change security profiles themselves.
Disable (or uncheck) this option for any staff that should not alter security profiles.
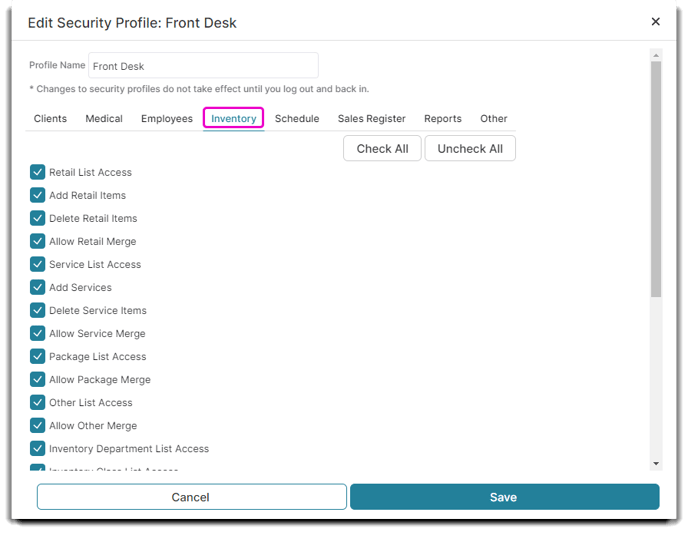
Inventory Tab
This section allows you to control access to the inventory related functions on the platform. Some functions listed under the Inventory tab includes physical retail inventory, service list options, packages, ordering functions, and more.
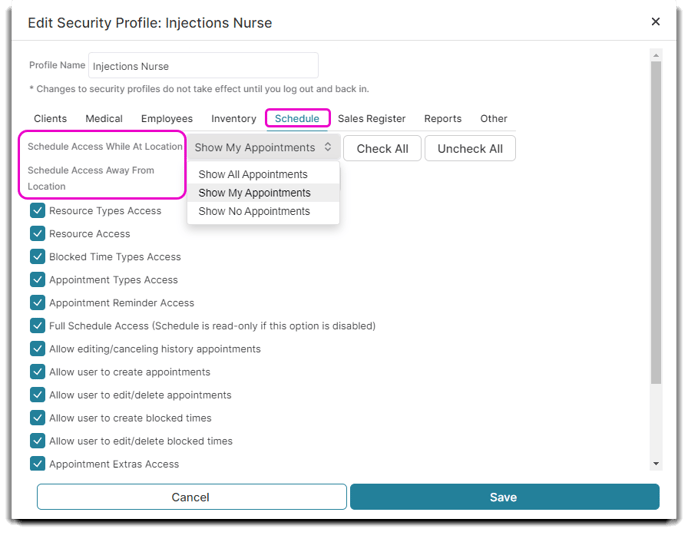
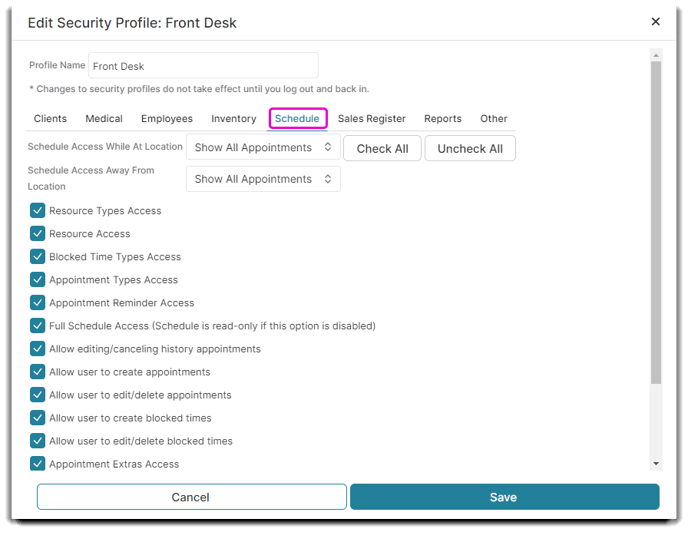
Schedule Tab
This section allows you to control access to the schedule and its function. Some functions listed under the Schedule tab include the ability to set or modify appointments and more. You can limit access to only that individual's schedule or the entire business' schedule at the top, based on their location.
To adjust accessibility access, click here to learn more.
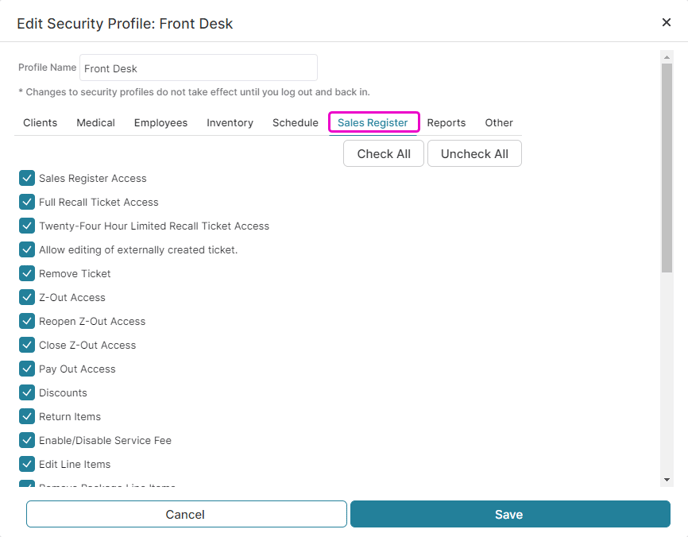
Sales Register Tab
This section allows you to control access to the sales register and its functions. Some functions listed under the Sales Register tab include ability to access the cash drawer, change tickets, return or void items, and more.
To limit access to externally produced tickets, click here to learn more.
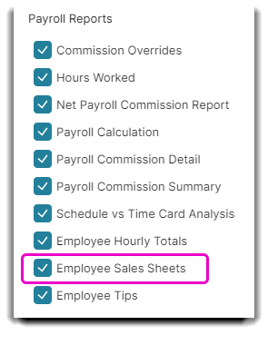
Reports Tab
You can also choose which employees have access to certain reports. Some functions listed under the Reports tab include specific reports to access and ability to change or modify any reports.
Note that the Employee Sales Sheets option will affect reports on your Desktop, as well as in your Daily Totals and Comparison Reports on the Employee App.
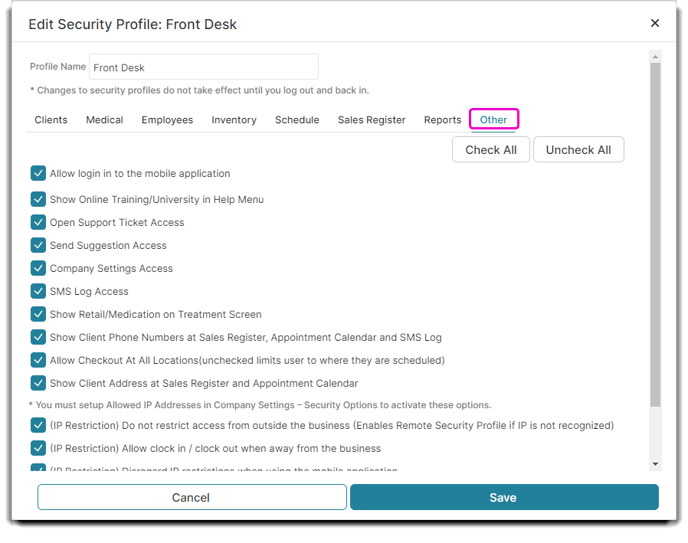
Other Tab
This section allows you to control access to broader functions such as account settings, log ins, help tickets, and more. IP restrictions can be found on this tab. For more details on changing IP access for security profiles, click here.
Remote Security Profiles
The remote security profile is active when the user is accessing the system from a non-whitelisted IP address. In other words, it restricts access to employees away from your business. To prevent giving access to an unrecognized IP address, the system will fall back to the Employee's regular security profile settings.
You must create two separate security profiles for the same department in order to use this feature properly. For instance, you might have Front Desk (in-store) and Front Desk (remote).
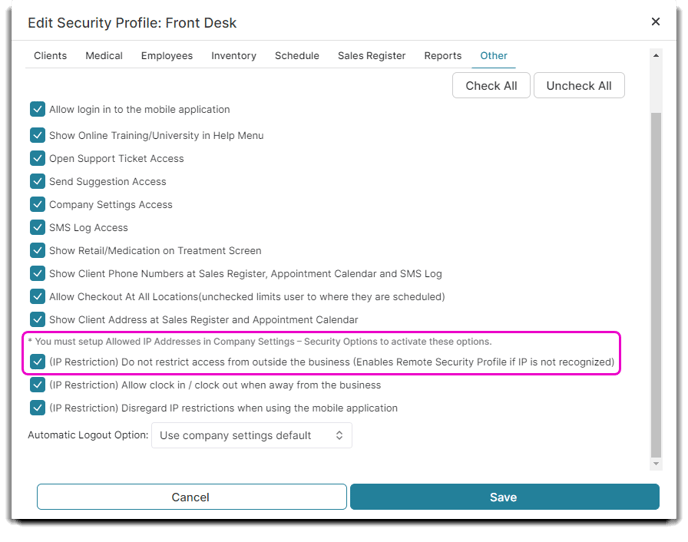
You are also required to setup allowed IP Addresses in Company Settings - Security Options to activate these options.
To enable Remote Security Profiles:
- Click on an existing Security Profile or create a new one.
- After you have setup Allowed IP Addresses in Company Settings, select the Do not restrict access from outside the business box, as shown in the photo below.
Once you've enabled the setting, find the Employee you'd like to add the Remote Security Profile to from your Employee List. Once on a specific employee's profile, under the Security tab, you can select both the security profile and remote security profile for each employee.
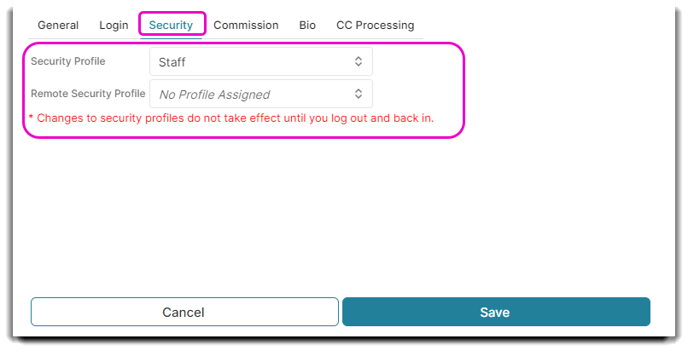
Here you'll be able to add both security profiles to your Employee.
◻️ Show/Hide Demographics on Employee Profiles
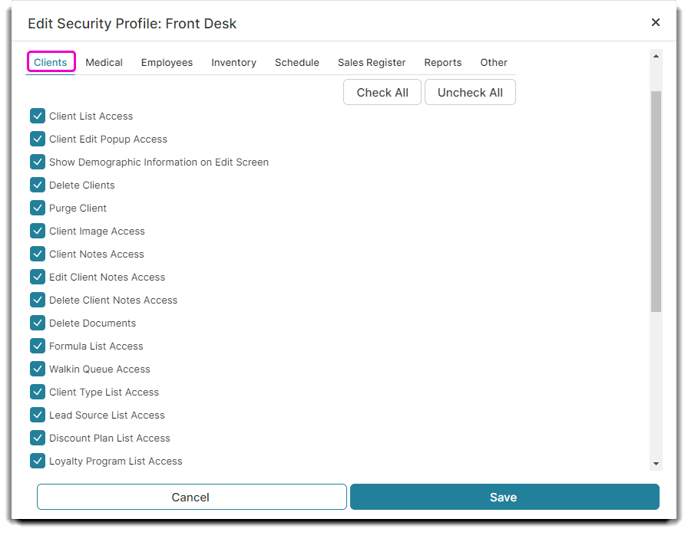
You can choose to Show Demographic Information on Edit Screen in your security profiles.
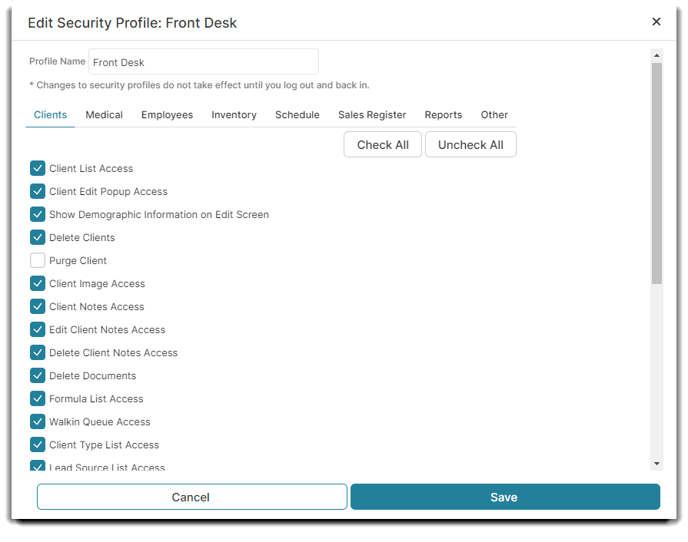
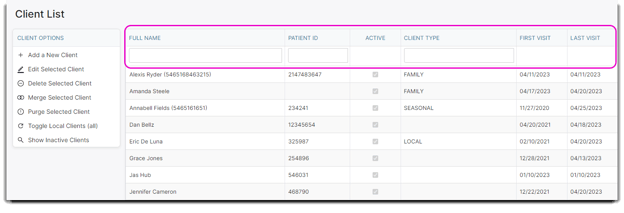
When you edit or add a new security profile, unchecking this box will hide all demographic information on the Client Edit Screen. If you want to limit which employees can view client's personal information, unselect this option. This will only affect the Edit portion of the popup window.
The fields will still be present to create a new Client Record only. If the Employee goes back to edit, these fields will not show.
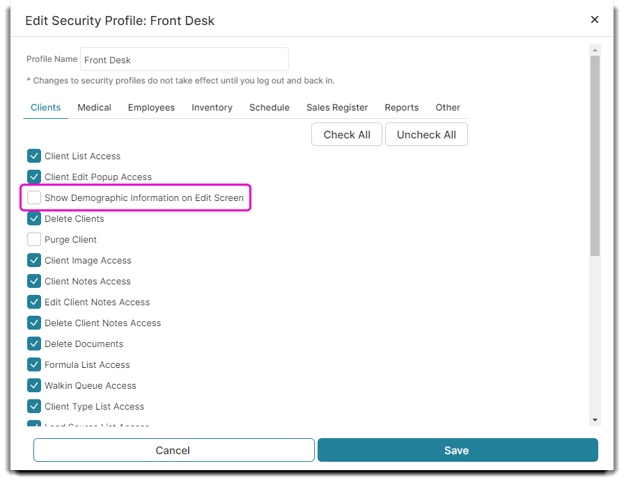
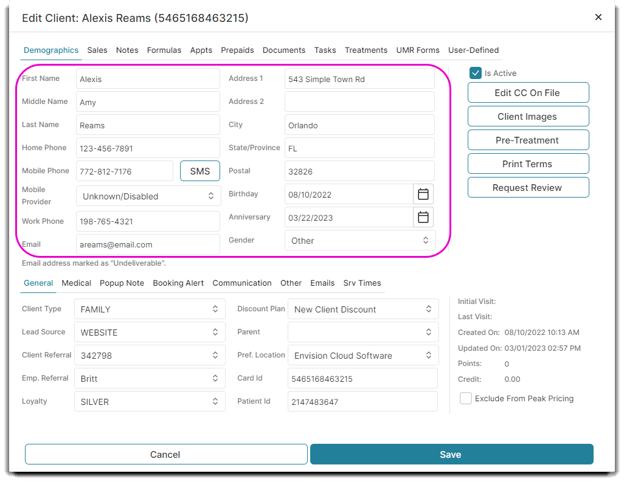
Below is an example of a security profile WITH the checkbox selected, showing all demographic information:
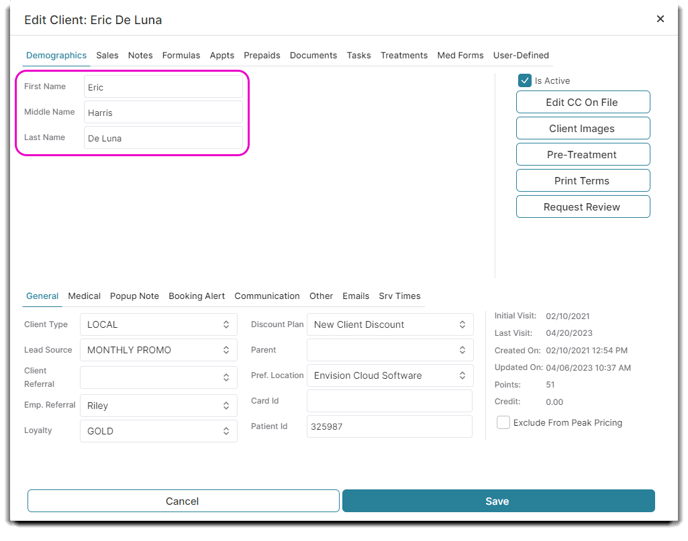
Here is what the edit screen looks like WITHOUT the checkbox selected to Show Demographic Information on Edit Screen (demographics are hidden):
Show/Hide Treatment Screen on Employee Profiles (PatientNow Essentials)
Just like Show/Hide Demographics, you can edit Security Profiles to restrict access to the Treatment Screen.
To edit, simply click on the Medical tab in your Employee's Security Profile.
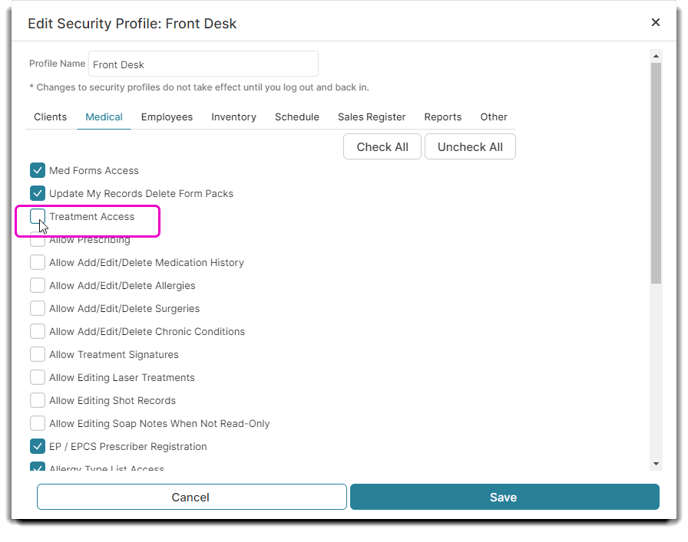
Click the ☑️Treatment Access checkbox to grant access and uncheck the box to restrict access.
Here is an example of an unrestricted Security Profile:
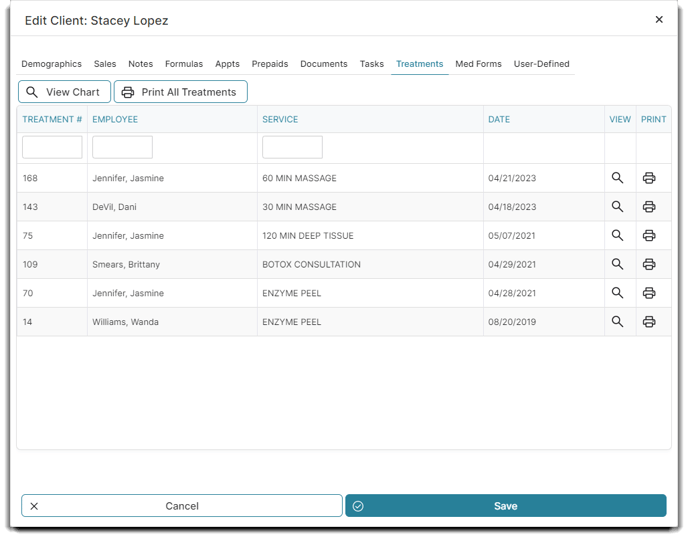
When the check box is NOT selected, your Employee will lose access to the Treatment Tab in their Client's Profile:

Limit Prescription Access and PMHx tab Access
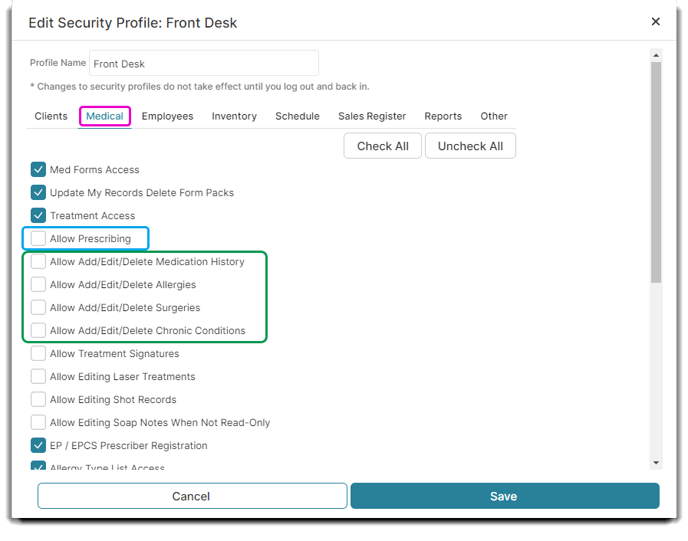
You can limit an employee's access to write prescriptions while still granting access to view the Treatment Tab in a client's profile. By selecting Treatment Access (as mentioned in the prior section above), an employee can see the Treatment tab without the ability to assign or submit prescriptions. You must select the ☑️Allow Prescribing option, as shown in the image below (in the blue box), to grant an employee access to write prescriptions.
You can also limit an employee's access to the PMHx tab (patient medical history) specifically by each section of the medical history tab, including medication history, allergies, surgeries and chronic conditions. You must select each option, as shown in the image below (in the green box) to grant each employee access to these individual sections under the PMHx tab in a client's profile.
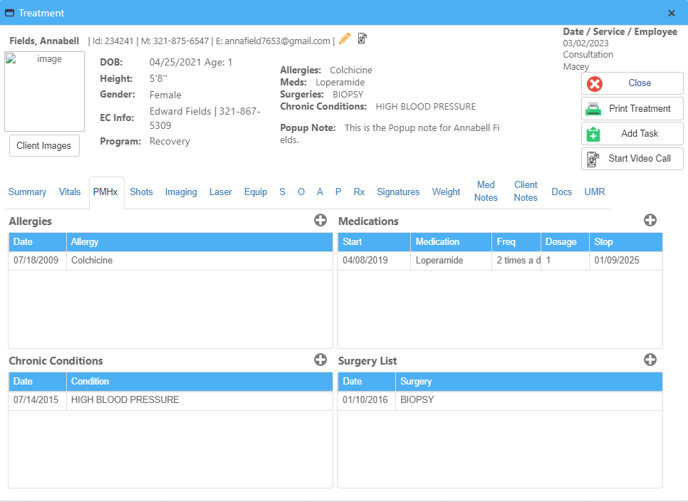
If you decide to limit an employee's access to the PMHx tab, here is an example of how that screen will look for your employee:
Editing External Tickets on Employee Profiles
You can also restrict access from certain employees to edit External Tickets.
- Click on the Sales Register tab in the Security Profile you've selected and check the Allow editing of externally created ticket box.

Accessibility Schedule
This option is turned off by default, and the only way to enable it is via security profile. This option helps people with visual impairment to use a custom browser to move around the fields. With this option turned off, you cannot move between timeslots in the accessibility software.
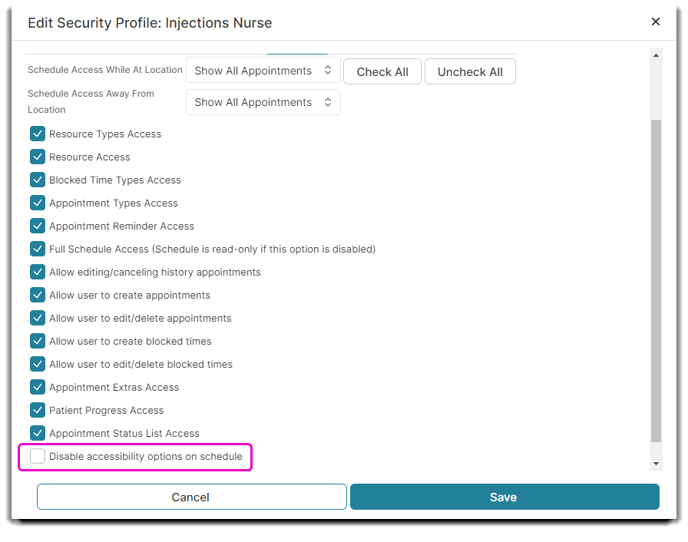
To enable the accessible schedule, uncheck 🔲Disable accessibility options in schedule in the employee security profile under the Schedule tab.
You will know it is enabled by scrolling to the bottom of your schedule and locating the accessible icon. 
The schedule will now have an access key of "W" (hitting 'alt-W' will focus the schedule in certain browsers). Or, you can just click on a timeslot to focus it.
Once it's focused, you can use the left/right arrows to move days back and forward, or the up/down arrows to move the selected timeslot.
Security Profile Tips
When using the Only Allow Logging In From Selected IPs option is selected, at least one IP address must be entered in the selection in the Company Settings.
Under the Schedule tab, there are two dropdowns which set whether and where an employee can view appointments. This is an important setting for many businesses!