How to log a Received Purchase Order
The Receive Purchase Order screen is used when products are physically received at your business. When you enter the quantity that was on the Purchase Order, the Purchase Order automatically becomes completed and its status becomes "Closed". Receiving any quantity less than what is on the Purchase Order keeps the Purchase Order active.
To open the Receive Purchase Order screen, hover over Inventory in the Tool Bar of Envision and select Receive Purchase Order from the drop-down menu.
Inventory > Receive Purchase Order
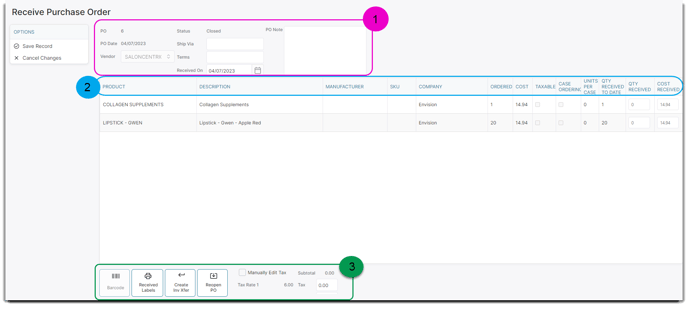
📦 Section 1
 This area is where you can input all of the information about your shipment.
PO
The number displayed is assigned by the program and is always unique for every Purchase Order. This number can be used when running reports or when searching for the Purchase Order in a list.
PO Date
This date will be filled in automatically. The date will be the same as your computer's date. The date can only be changed in the Purchase Order screen.
Vendor
The vendor that was selected when the Purchase Order was created will be displayed here. The information displayed here cannot be edited.
Ship Via
The Shipping method that was entered when the Purchase Order was created will be displayed here. For example, your products may be shipped to you via UPS or USPS.
Terms
Terms are the conditions that a vendor will require for the sale. These terms specify the amount of time allowed to pay off the amount due and may require cash in advance, cash on delivery or a deferred payment period of 30 days or more. This is normally pre-arranged with the vendor.
Received On
The date that this order "Received" or arrived at your business will be displayed here. This information can be entered when the Purchase Order is created.
Status
The program will automatically set the status. The status depends on whether the order has been received or not. If this is a new Purchase Order that has not yet been received, the status will display "Open". If you are viewing a previously received PO and the product has been checked in, you will see the word "Closed". If you received only part of the product listed on the PO, it will display "Open".
PO Note
Add any additional notes about the Purchase Order here.
✅ Section 2
 This area is home to all of your product information.
Product
The Item Id is the name of the product or the name that was entered when the product was added to your Retail Products list.
Description
The item description that was entered on the item's profile will show here.
Manufacturer
The manufacturer entered on this item's profile will show in this column.
Vendor SKU
This is the ID code the vendor uses to identify the product The Vendor SKU is the number that is displayed next to this item on the invoice. It is an identification number for your vendor that is used during the ordering process. It communicates accurately to the Vendor exactly which product you are ordering. If a Vendor SKU has not been entered for your products, this can be done in the Retail Products list.
Company
The company name selected when creating the purchase order will show here. This is a feature for multiple locations.
Ordered
The "Ordered" quantity is the amount that was ordered for the item. This quantity can only be edited in the Purchase Order.
Cost
This is the cost of what was ordered with the initial PO.
Taxable
This box will be checked by default if you have checked the "Tax When Ordering" check box for this item in the Retail Products list. The values entered into Tax Rate 1 - 2 - 3 from the Purchase Order will be used to calculate the sales tax. Check the "Taxable" box if you paid sales tax on this item.
Case Ordering
This box will be checked if the "Use Case Ordering" option is selected on the corresponding item's profile in the Retail List.
Units Per Case
This box reflects the 'Units per Case" entered on the corresponding item's profile in the Retail List.
Quantity Received To Date
How many of the items that you've ordered that have already arrived. This allows you to document a partial quantity.
Received
The "Received" field is where you will enter the amount of each item that you have received. When you select to save the record, your "Qty On Hand" for each item will be updated automatically to be the new quantity, including the new items received.
Cost Received
The "Cost" is where you can edit the cost of the product. It is best to enter the correct cost of the item when the product is received because the cost may have changed or you may have received a discount on the item.
💲 Section 3
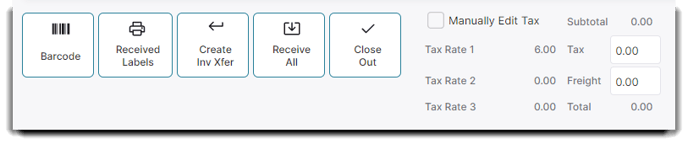
This area is where you will find all of the tools to manage your PO.
Barcodes
Click this button to enter the quantity and scan the barcodes of each item that you are receiving.
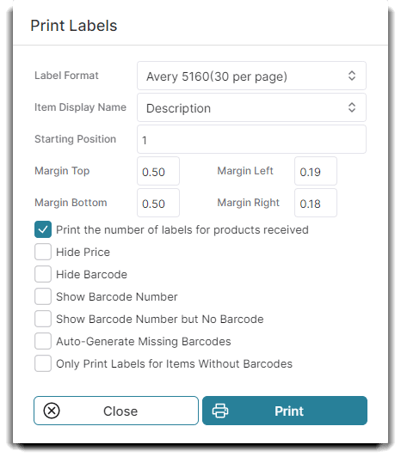
Print Received Inventory Labels
Select this button to open a pop-up window that will allow inventory labels to be printed for items received on this Purchase Order.
Receive All
If your order came in exactly as you ordered it, click this button and all the items on the PO will be received automatically. The "On Hand" quantities will be updated to the new physical quantity when you click the "Save" button. This is a great time-saving feature.
Close Out
This will close the Receiving screen for this Purchase Order and prevent future edits. Click this button to cancel all remaining items that haven't been received.
Manually Edit Tax
Here you can select to manually edit the taxes on your PO or choose to use a fixed ratio. In this section you can also enter freight shipment costs.
______________________________________
After A Purchase Order Has Been Received
After you have closed or completed a purchase order, the buttons at the bottom of the order will update.
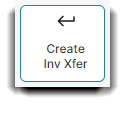
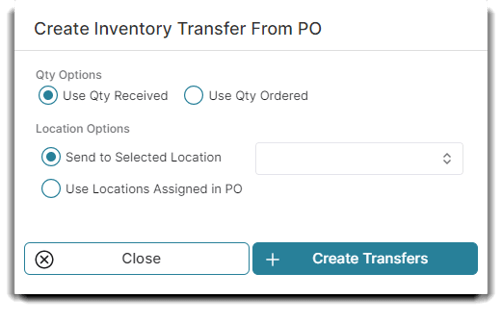
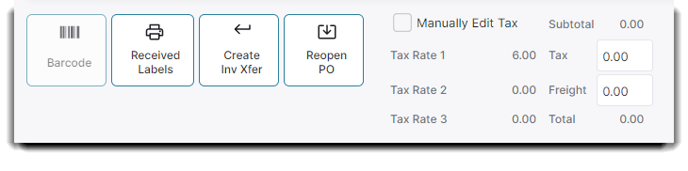 Once fully received, you can create an inventory transfer to move products between locations or reopen a purchase order if it was received incorrectly.