
How to add/edit and manage your purchase orders
Purchase Orders (PO's) are a key element for maintaining inventory. In Envision, Purchase orders work in conjunction with the Receiving Inventory screen, which closes out the Purchase Orders.
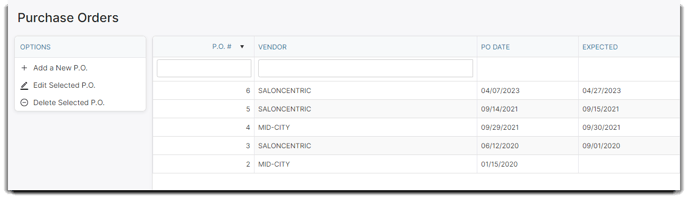
You can find your Purchase Order List under the Inventory main dropdown menu.
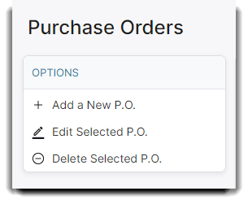
To begin, click on Add a New P.O.
PO (Number)
The number displayed is assigned by the program and is unique for every Purchase Order. This number can be used when running reports or when searching for the Purchase Order in a list.
Vendor
Click the drop-down arrow to select the vendor from the list of vendors you entered when you set up the program.
PO Date
This date will be filled in automatically. The date will be the same as your computer's date. You can change this date if necessary. For example, you may be creating your Purchase Order on a weekend but will not be sending the order in until Monday. You will need to enter Monday's date instead of today's date in this situation. The date can only be changed in the Purchase Order screen.
Expected On
Click the drop-down arrow to select the date that this order is expected on. A calendar will appear when you click the drop-down arrow.
Ship To
Choose the location for the ordered items to be delivered. This is a feature for multiple locations.
Ship Via
Enter the shipping method you will be using. For example, your products may be shipped to you via UPS or USPS.
Terms
Terms are the conditions that a vendor will require for the sale. These terms specify the amount of time allowed to pay off the amount due and may require cash in advance, cash on delivery or a deferred payment period of 30 days or more. This is normally pre-arranged with the vendor.
Order List
After selecting Edit Selected P.O., you will be directed to another screen with the purchase order details, it will look like the example below. 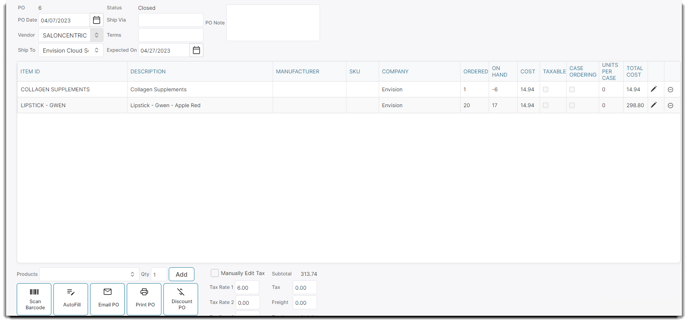
Product
The Item Id is the name of the product or the name that was entered when the product was added to your Retail Products list. The Product Id or Item Id will be displayed when items have been added to the order. If you would like to manually create a Purchase Order, click in the field labeled Click here to add a new row. You will then be able to select an item from the drop-down menu of your retail products. This list will also include your Back Bar products.
Vendor SKU
This is the ID code the vendor uses to identify the product. The Vendor SKU is the number that is displayed next to this item on the invoice. It is an identification number for your vendor that is used during the ordering process. It communicates accurately to the vendor exactly which product you are ordering. If a Vendor SKU has not been entered for your products, this can be done in the Retail Products list.
Description
The item description that was entered on the item's profile will show here.
Manufacturer
The manufacturer entered on the selected item's profile will show in this column.
Company
Shown here is the location for the ordered items. This field may be edited when editing the item. This is a feature for multiple-locations.
Ordered
The "Ordered" quantity will be filled in automatically if you use the Autofill PO based upon Inventory Needs button. The program will determine exactly how many of each item should be ordered depending on the Autofill option selected. If you choose not to use the Autofill feature, you will need to type the quantity that you would like to order into this field.
Cost
The cost will be filled in automatically when you select the product from your list of products. The cost is the amount entered into the Cost field for this item in the Retail Product profile.
Taxable
Check the Taxable box if you must pay sales tax on this item. This box will be checked by default if you have checked the Tax When Ordering checkbox for this item in the Retail Products list. The values entered into Tax Rate 1 and 2 below will be used to calculate the sales tax.
Case Ordering / Units Per Case
The case ordering box will be checked if the Order by Case option is selected on this retail item profile. The number of units in a case also comes from the retail item profile. These are view-only fields.
Total Cost
The Total Cost field will automatically calculate the dollar amount of the order based on the Qty and Cost fields.
Add Item
Select an item from the drop-down and select Add to manually add an item to the list. The items will be sorted in alphabetical order not by the order you add them in.
Remove Item
Click the Remove button to remove the selected item in the list.
Edit Item Pencil
This will allow you to edit the Order Qty, Cost and taxable option for any line item.
Scan Barcodes
Click this button to scan the barcodes of the items that you would like to enter into the Purchase Order. You will then need to specify the quantity you would like to order of the product you scanned.
When you've scanned more items than the original Purchase Order specified, the following warning will popup on your screen:

AutoFill
Click the Autofill PO Based Off Of Inventory Quantities button if you would like the program to determine which products and the quantity of each product that needs to be ordered from the Vendor that you have selected. The program will automatically fill in the Purchase Order for you.
This is a feature that will save you a large amount of time. No one will need to create a list manually and you will not need to depend on your vendor to tell you which products should be reordered. This will also save you money because you will be ordering only what you need.
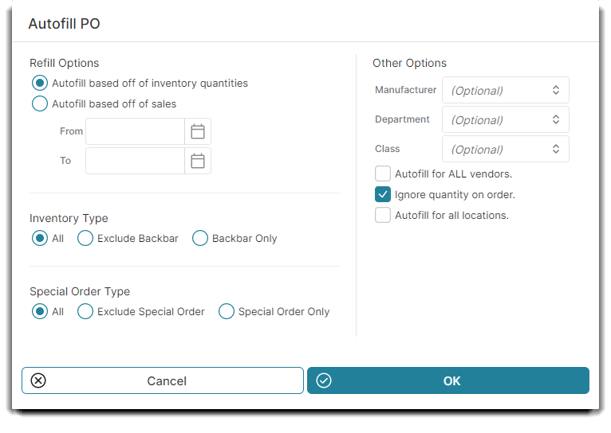
Refill Options
Autofill PO Based off of Inventory Quantities
Click this option to automatically load all the items from this Vendor that have met the "Reorder At" level you set when you added the items to the Retail List. Clicking this button will also enter the order quantity for each item that you have entered a Restock Level for.
Auto fill based off sales
Select this option if you would like to "Autofill" the Purchase Order based upon the number of products sold between the dates specified in the "From" and "To" section.
Inventory Type
All
Order all items, both those marked as backbar/inhouse use and retail items available for sale.
Exclude Backbar
Order only items available for sale to clients and not marked as backbar.
Backbar Only
Order only items marked as backbar/inhouse use.
Special Order Type
All
Checking this box means you want to order all items marked as Special Order
Exclude Special Order
Order items that are not marked as Special Order.
Special Order Only
Only order items marked as Special Order
Other Options
Specific Manufacturer
Only choose items that meet the above criteria with this manufacturer in the retail item record.
Specific Department
Only choose items that meet the above criteria with this department in the retail item record.
Specific Class
Only choose items that meet the above criteria with this class in the retail item record.
Autofill for ALL vendors
Input all items on this purchase order, regardless of the vendor.
Ignore quantity on order
Disregard any 'on order' quantities for the items that meet the above criteria and add them to this order.
Autofill for all locations
Input items for all locations onto this purchase order.
Manually Set Tax
Use this checkbox to set a fixed tax amount.
Tax Rates 1 - 2 - 3
The Tax rates you entered for your location on the Tax Setup tab when you set up the Company Settings will appear here. You may change the tax rate here if necessary.
Subtotal
The "Subtotal" is the total of all the items on the order. This total can be changed to the actual amount at the time of delivery. When you are using the Receiving Inventory screen, you will be updating the costs at the time of delivery.
Freight
You can enter a Freight charge here and it will be added to your total for this order. This total can be edited to the actual amount at the time of delivery on the Receiving Inventory screen. You can also edit the freight in the Purchase Order when the vendor notifies you of the freight charges.
Tax
Any tax you must pay will display here. The tax is enabled on the retail item screen when selected to "Tax When Ordering".
Total
The "Total" includes the Subtotal, Freight and Tax.