How to track a client's appointment status
The Client Appointment Progress screen is available with PatientNow. To upgrade your account, please contact our Sales Team at 800.436.3150 or sales@patientnow.com.
The Client Appointment Progress Screen is an easy way to enter and track the progress or flow of appointments. To open the appointment progress screen, hover over Schedule, and select Client Appointment Progress.
Schedule > Client Appointment Progress
Click to begin!
☑️ How to Enable the Begin Service Window
💆 How to Use the Client Appointment Progress Feature
💻 How to Manually Enter Client Appointment Progress
🔑 Appointment Progress Key

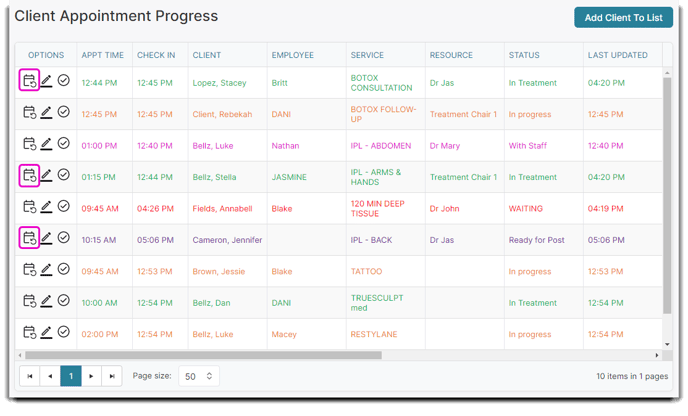
Client Progress Screen Close Up
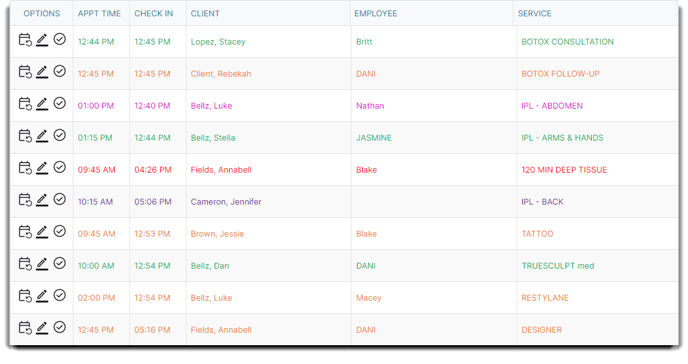
Appt Time
The time the appointment was entered will show here.
Check In
The time that the client was checked in for their appointment will display in this column.
Client
The client selected for the appointment will show here.
Employee
The provider selected will display. If no employee is chosen, the Inhouse employee will show.
Service
The appointment service will show in this column.
Resource
If a resource has been selected or assigned for this appointment, it will display in this column.
Status
The appointment status last selected for the appointment will show. Appointment statuses must be created in the Appointment Status List.
Last Updated
The last time the appointment progress was updated will appear here.
Options
The options available for each appointment in the list include changing the appointment status, editing the treatment record, and marking the service as completed.
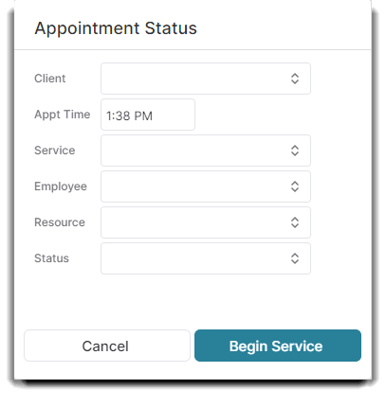
 Change Status Change Status |
will open the Patient Status box, allowing you to change the room or resource and update the patient status |
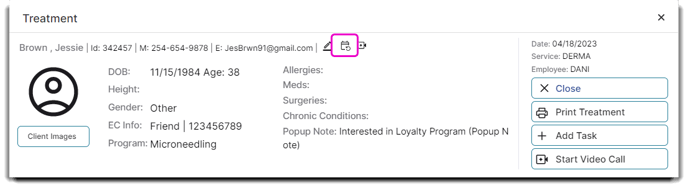
 Edit Treatment Details Edit Treatment Details |
will open the treatment screen for the appointment |
 Mark Completed/ Add to Checkout List Mark Completed/ Add to Checkout List |
will open a window asking if you want to add to the checkout list or complete the service to remove it from the list. |
☑️ How to Enable the Begin Service Window
In order to have access to this feature on your calendar, you must enable the Begin Service option in your Company Settings:
- Open Company Settings, then select Schedule Options.
Company Settings > Schedule Options - Under the General Schedule Options tab you will see the Use enhanced 'begin service' window to add appointment to appointment progress page checkbox.
This box must be selected in order for this feature to properly function.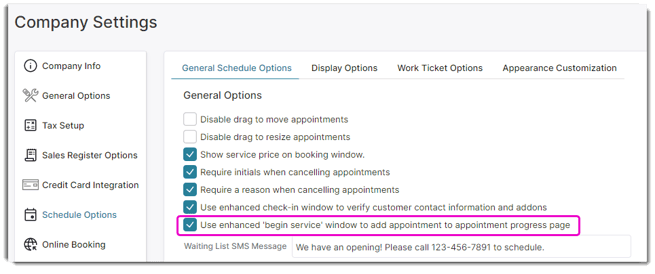
💆 How to use the Client Appointment Progress Feature
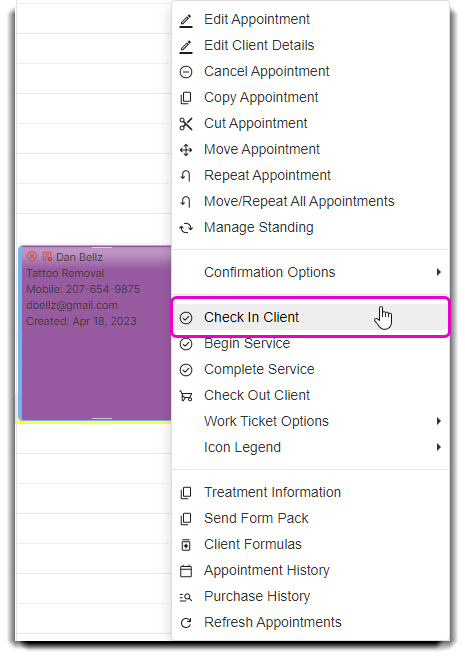
1. Start by checking-in the client. Right click an individual appointment, select Check In Client from the dropdown.
2. Once select, you will see a popup screen to verify the client's contact information and/or add any additional products or services before you complete the check in process.
You can also view the client's information by selecting Detailed Client Info. You can also view the client's previous formulas by selecting Show Formulas. You can also print the work ticket or notify your employee through a SMS employee check-in notice.
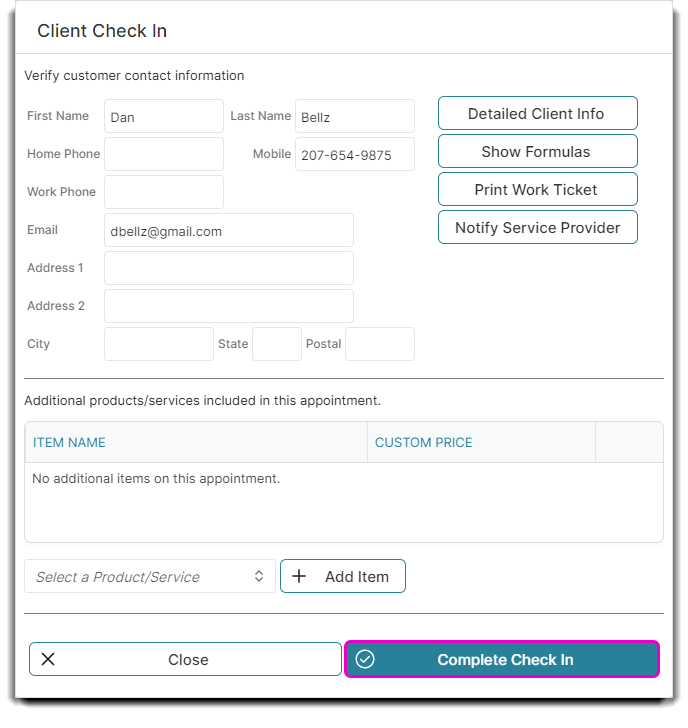
3. Click Complete Check In button once you verify client information or add any additional services.
4. Once your client has checked-in, their name will appear under the Waiting to Begin Service column on the left-hand side of your appointment calendar.
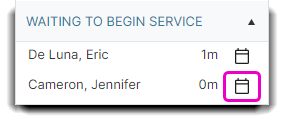
5. Click on the Change Status calendar icon (shown above).
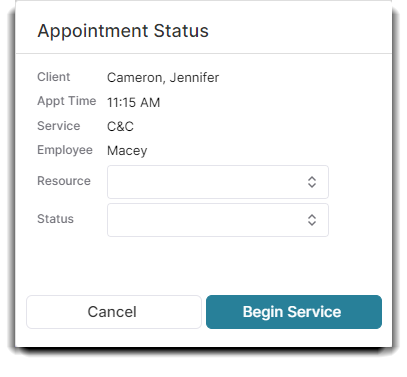
Here is where you can edit the client's resource and treatment status. You can access it initially from the left column beside your Calendar, and then through the Client Appointment Progress screen. You can also access it directly from your client's treatment screen.
Schedule > Client Appointment Progress
Schedule > Appointments > [Specific Appointment] (right click) > Treatment Information
6. Once the client is ready for checkout, click their corresponding checkmark icon.

The following window will popup on your screen:
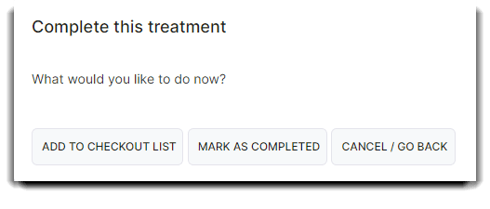
Hit the Cancel/Go Back button if you did not want to Complete the treatment process.
Clicking Mark as Completed will mark the service complete in your Calendar, but will not add the service to the Checkout list.
If you click Add to Checkout List, your client's appointment will conveniently appear on the left-hand column in your Calendar screen:
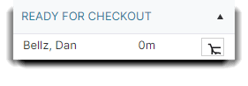
7. Click the Cart icon to bring this appointment to the Sales Register.
8. Checkout the client as usual.
💻 How to Manually Enter Client Appointment Progress
If you do not enable this feature in Company Settings, the Waiting to Begin Service area will not appear on your Calendar. Instead, you will have to manually add clients using the Add Client To List button in the Client Appointment Progress screen and then continue the process through to checkout.